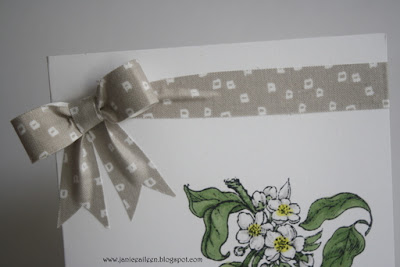
Hello, everyone! Janice here with a little tutorial on how to make a bow with our fabulous Love My Tapes fabric tapes. :)
I received so many great comments on the fabric tape bow I made for the Pretty Little Studio + LMT blog hop that I thought I'd show ya how I did it! Here is the card I made with the fabric tape bow:
Isn't that squirrel die cut just darling?
Alright, so let me show you how to create your own fabric tape bow!
Cut one strip of fabric tape long enough to reach across the card.
Next, remove about two inches or so of the tape backing and pinch the end.
Adhere the pinched end about an inch from the side of the card you want your bow to sit first, leaving the gathered section the pinch creates raised as you adhere the rest of the tape to the card.
Next, cut a strip of tape about 4 1/2" long and, with the backing still in place, fold it in the bow shape shown below.
Now, pinch the middle section together to create a gathered look in the center.
Take the backing off and wrap it tight around the center of the bow.
Take a pencil. marker or pen and open/give shape to the bow loops a bit.
Next, cut two strips of tape for the "ends" of the bow and with the backing removed, pinch on one end and cut a triangle out of the other end (on both strips).
Now you're ready for the bow to come together! Adhere the two end strips to the card only adhering the sides and end to create that gathered section that gives it a "real" tied bow look.
Glue down the bow loops and...voila! It looks like you took a ribbon and tied a bow right onto the card!
I hope you found this tutorial helpful! If you have a chance, give the fabric tape bow a try and post it on our Facebook page, I'd love to see your creations! You can go HERE to find the fabric tape I used, from the Fabric tape set called "Camellia."
Until next time,
Janice :)


What a great tutorial! I am so glad you showed us how to do this...I love it!
ReplyDeleteI absolutely love this!!!!
ReplyDeleteWhat a stunning bow ans so simple - great tutorial thanks Janice.
ReplyDeleteBlessings
Maxine
Thanks for a great tutorial!
ReplyDelete