Pages

Saturday, December 27, 2014

Lace flowers card

Hello Love My Tapes fans! This is Maya and today I am sharing a card made with beautiful lace tape from Love My Tapes.

I made a monochromatic card in shades of white, linen and cream with lace flowers. 


Here is a quick tutorial for making the lace flowers. It is really simple and the adhesive on the back of the lace helps holding everything together.


Vintage buttons look great with this elegant lace. I used another piece of slightly wider lace under the sentiment.


Thank you for stopping by today! I wish you happy and creative 2015!

Friday, December 26, 2014

Congrats Card, and Pocket Style Scrapbooking with Washi Tape


Hi Everybody!
Jenny from Crazy About Cricut here, and it's time for another project for the Love My Tapes Design Team!!  First up, is a cute and simple Congratulations card using some gorgeous black and white scalloped washi tape:


*The card base size is 4" x 4", the black mat is 3 3/4" x 3 3/4, 
and the top white mat is 3.5" x 3.5".
*The side border of washi tape really adds some great dimension!


*Here's a close up.


I also have some fun, easy pocket style scrapbooking cards so share today.  Using theme style tapes can really be a fun embellishment to use!  Enjoy the video :)


TFL, and hope everyone has a chance to craft today :)


Tuesday, December 23, 2014

Christmas Cards- Lace Tape Style!

Hey everyone, Katie here! Can you believe Christmas is in only 2 days? While it is too late to mail out Christmas cards now, I still wanted to show you these that I made to send to friends. Maybe they'll inspire you to use some of the lovely lace tapes on gift tags!


I love the soft touch the lace tape gives to the cards, don't you?

Merry Christmas!

Monday, December 22, 2014

Create an Interactive Layout with Washi Tape

Hello Love My Tapes blogging friends.  Marcia here today to share how you can create an interactive layout with washi tape. I have an amazing friend that creates several gingerbread houses from scratch every year (30-40 houses!). Then she and her daughters host gingerbread decorating parties. She supplies all the candy and frosting too. It was such a fun time I had to scrap a layout about it. But I had a couple photos I wanted on my layout and if I printed them smaller than 4x6 it would be hard to see the details. If I put them side by side on my layout, I would cover up too much of this fabulous die cut from 17Turtles. What to do? I decided to create a flip book right on my layout. Then I could flip it open to see my other photos.


The photo flips open, like a book. This way I could add more pictures underneath. Look at my decorated Gingerbread House, complete with a sleigh, snowman, trees, a little doggie, and Santa climbing down the chimney! 


Here is how you can make one too. Cut your pattern paper slightly larger than your photos. Lay them side by side and use washi tape to adhere them together.


Now flip it over and do the same to the other side. Trim the excess tape at the top and the bottom. Then adhere your flip book to the layout.


Thanks for stopping by. Have a great week!

Thursday, December 18, 2014

Fabric Tape Bound Mini Album

Hey everyone, Katie here! Today I wanted to take a break from all of the Christmas projects to share with you guys this mini album I created using some pictures from a camping trip.

I make a lot of mini albums so I know a few different techniques for binding them. I created this one by using fabric tape for the binding. Here's how:


1. Start by cutting out your pages and front/back covers  from patterned paper or cardstock.

2, Place your cover face down onto your workplace with your first page face up right next to it. Take a strip of fabric tape and place where to 2 papers meet. Press firmly.


3. Fold your first page over to the left and repeat step 2 with your next page, lining it up and adding a strip of tape.


4. Repeat until you have all of your pages and back cover. I also added a couple of fabric tape strips around the back edge to hide where the pages are on the back.


I used a couple of my favorite black and white washi tapes on the inside pages as well.


Thanks for reading! :)

Friday, December 12, 2014

Pretty gift bags in a flash

Happy Friday! I hope you are stopping by to get some inspiration for crafty projects to work on over the weekend.  If so I, Jaclyn, have just the idea for you.  It's a quick, easy and beautiful way to dress up your gifts for the holidays. 


The supplies are simple and probably things you already have on hand:

plain kraft gift bags (I purchased mine at the dollar store - 4 for $1.00!)
glitter adhesive-backed cardstock
premade tags
coordinating washi tape
ribbon/twine
additional embellishments, you wish to add.

The first step is to create a glittery banner backdrop for each gift bag.  I cut a strip of LMT's glitter adhesive cardstock to 3"x6", notching the bottom edge.  Once cut, the chunky banner easily and securely adheres to the front of the bag.


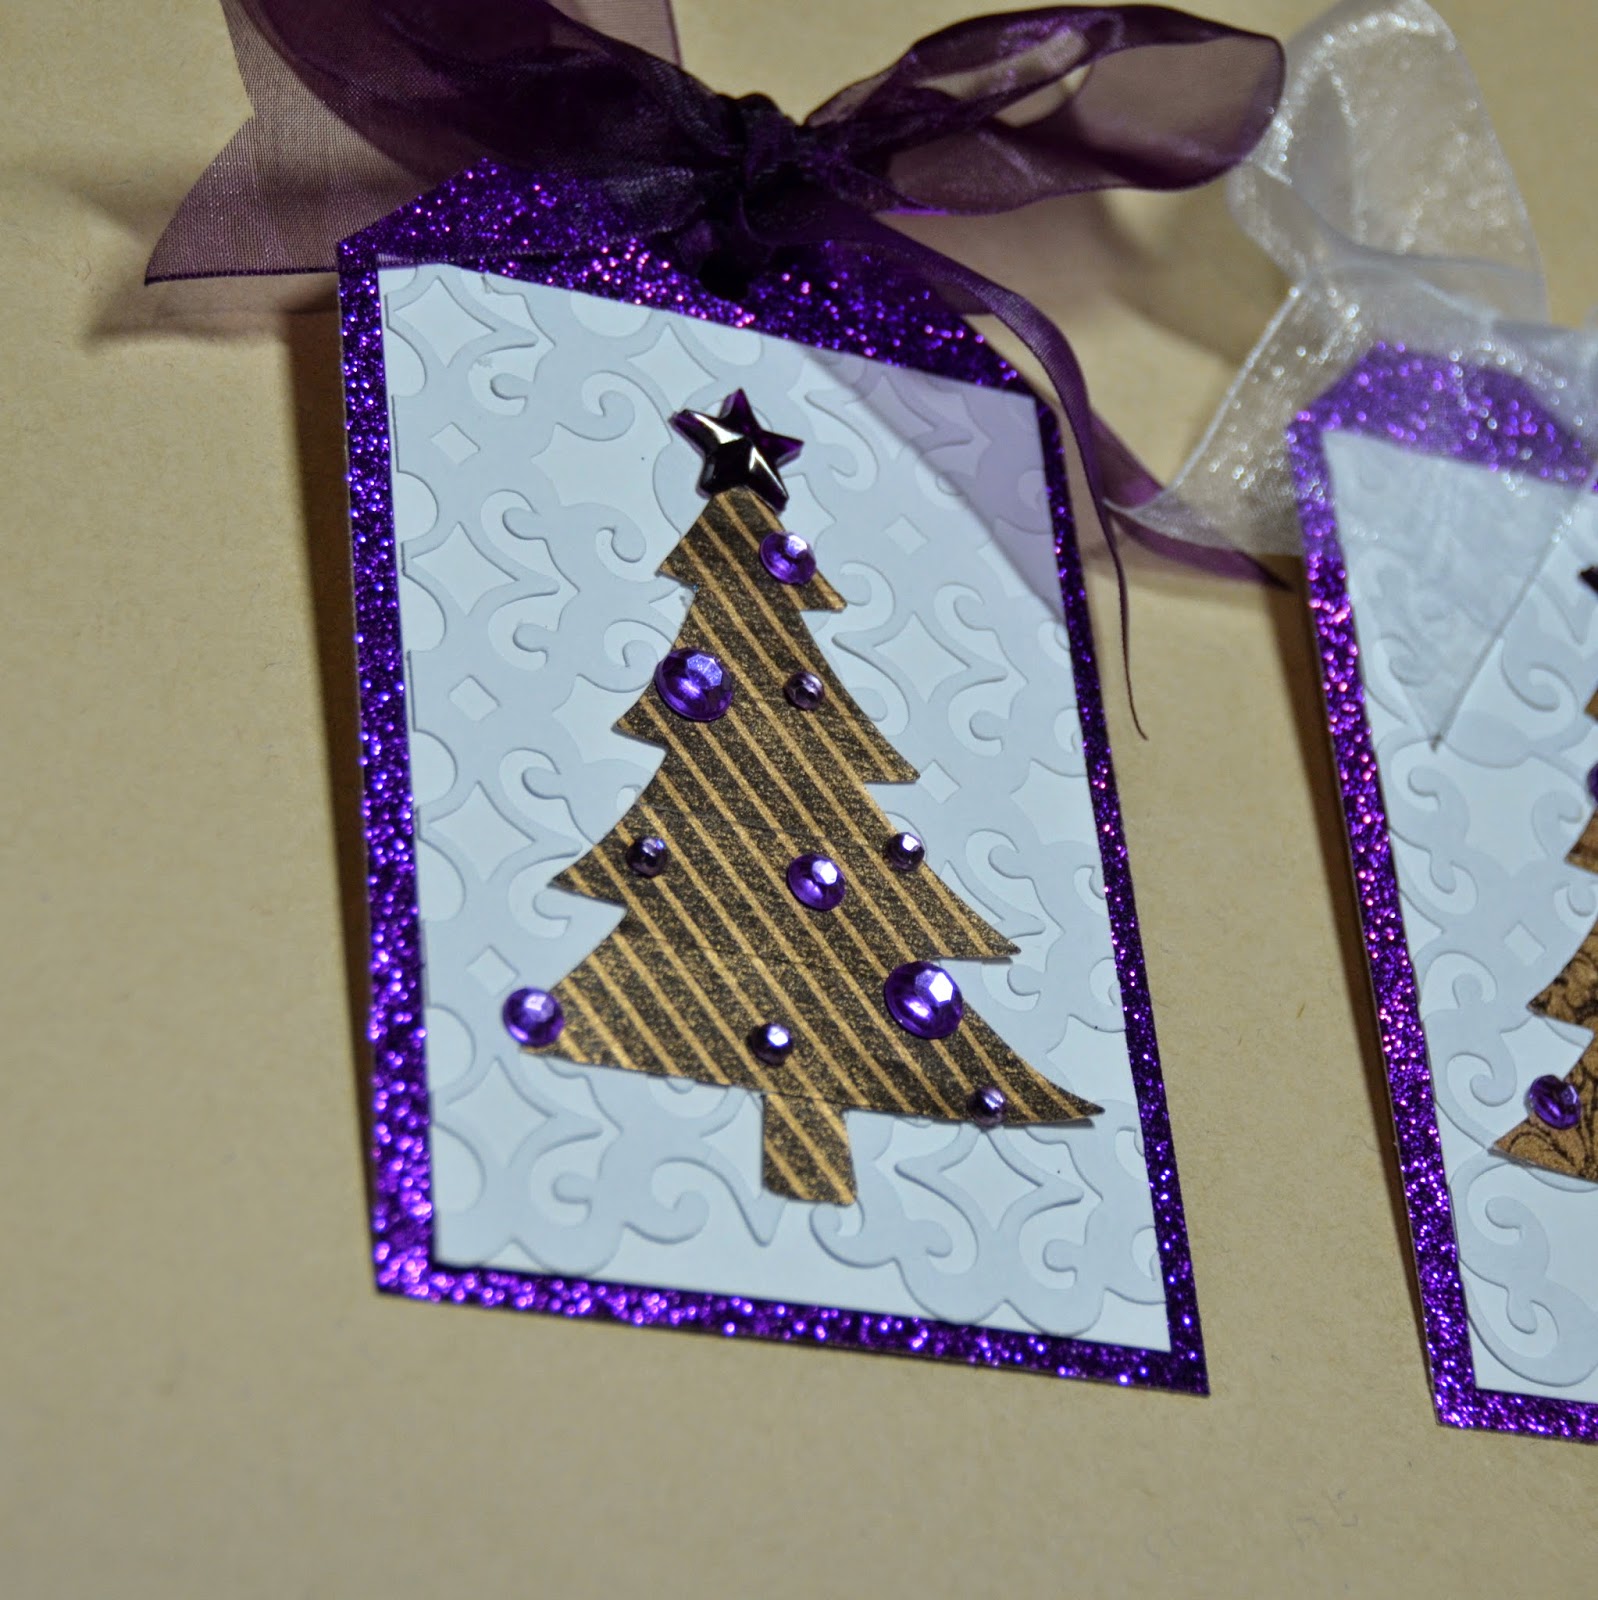
The 'tags' I used are cut from a stack of Die Cuts with a View patterned papers.  I dressed them up with a few pearls, strips of coordinating washi tape, and a punched hole for adhering.  Ribbon and twine provide just the right finishing touch.


If you are embellishing more than gift bags this weekend, check out my previous posts here and here for ideas for dressing up baked goods and pillow boxes.  All of these examples can be customized for the occasion!

Thursday, December 11, 2014

Elf Gift Bag


Hi Everybody!
Jenny from Crazy About Cricut here, and it's time for another video for the Love My Tapes Design Team!!  I'll have you ready for gift giving with today's project!  Enjoy the video :)


TFL, and hope everyone has a chance to craft today :)


Wednesday, December 10, 2014

Garland Gift Wrap with Glitter Paper

Tessa Buys here with a holiday confession: I am a terrible gift wrapper. No matter how hard I try, I just cannot make the crisp corners and even edges that I want. So, I circumvent wrapping paper by using pretty boxes and bags. One of my favorite ways to dress up a simple box is to wrap it in ribbon, twine, trim and mini garlands. Using Love My Tapes Glitter Paper, I created the garland you see in the center here:


Because the glitter paper is adhesive-backed, it's really easy to make this garland.


First, punch an even number of shapes out of the glitter paper. Second, peel off the backing of one shape and apply to your twine (or thread, string, yarn, etc.). Third, peel off the backing of a second shape and apply it over the first, making sure to line up the shapes so that they match perfectly.


The paper punches beautifully and the adhesive is strong. Every time I want a little sparkle for a gift box, I'm turning to my Love My Tapes Glitter Paper. Thanks for stopping by today!

Tuesday, December 9, 2014

Sparkling layout with gold washi tape

Hello Love My Tapes fans! This is Maya, and today I am sharing a sparkling layout with gold washi tape.


I used the new Teresa Collins Studio Gold collection for this layout. To accent the bold black and gold I made washi tape hearts.
I covered pieces of vellum paper with washi tape and handcut the hearts with the scissors.


I arranged my hearts in two columns and run a stitch in the center of each column.


I have a beautiful layout with unique, one of a kind embellishments.

Thank you for stopping but today. I wish you a lot of joy and sparkle this holiday season.

Friday, December 5, 2014

A glittery Christmas countdown

If you're a regular visitor here on the LMT blog, you've probably noticed that the design team girls have been having lots of fun with the 12x12 glitter adhesive sheets.  Well, it's Jaclyn here today to share with you another idea for this fun and decidedly festive product!

Since I have little ones at home, we love to find ways to countdown the days leading up to Christmas.  We've adopted the tradition of wrapping up 24 of our holiday books and unwrapping and reading together one each night before bedtime.  In year's past, sometimes the books get wrapped up neatly and other times they are all stuffed in the basket at the last minute (!).  This year, I prepped a little early and was able to wrap AND decorate each book with a glittery number tag, for each day of December.


The glitter adhesive sheets make this project oh-so-simple and quick, especially if you have access to an electronic die cutting machine.  I found a fun circular number file in the silhouette store by Karla Dudley.  By adjusting my machine's cut settings properly, I was able to cut through the glitter sheets with ease.


This left me with 24 custom made, glitter stickers that I then adhered to a circle of white cardstock for added effect and focus.


Have you tried cutting any specialty mediums in your electronic cutter?  If not, give it a try - the results are sure to be fun and addicting!

Wednesday, December 3, 2014

Lace Tape + Glitter Paper Christmas Cards

Hey everyone, Katie here! It's December, can you believe it? Christmas is only a couple of weeks away so it's definitely time to start sending off Christmas cards.
I made these 2 Christmas cards using fabric tapes, silver glitter paper and gold washi.


I started by coloring the lace tapes green with gelatos. I just scribbled the color on them and then sprayed them with water to blend the colors.


I stuck the tapes down onto the front of my card, in a general tree shape..


Then I cut a Christmas tree out of the silver glitter paper and adhered the negative part of the diecut to the front of my card, so that the lace shows through. I love that the glitter paper has an adhesive back!

I created a second card with the glittery Christmas tree diecut that I didn't use on the first card.


Thanks for stopping by today!

Tuesday, December 2, 2014

Holiday tags with washi tape and glitter cardstock

Hello Love My Tapes Fans! This is Maya and today I am going to share two quick holiday gift tags.


I started by layering strips of pretty bronze washi tape on vellum. I used Silhoueete Cameo to cut out two Christmas trees from the washi covered vellum. I adhered them to cardstock tags and added shiny stars and sparkly jewels.


I mounted the white tags on pretty glitter cardstock from Love My Tapes. The cardstock is very thick and make a very sturdy tags. I kept the adhesive backing on.


Pretty bow as a last touch and I have two festive tags ready for the holiday season.


Thanks for stopping by today!