Pages

Thursday, September 24, 2015

Mandala Card

Charity here from Scrappin' Chaos.
Today I have a card decorated with the ancient art form of Mandalas. I used paper doilies, and Stickles, and an assortment of Love My Tapes washi for the repeating patterns.
~ Congratulations ~
 I trimmed each strip of washi length wise to fit my design.  I carefully measured and marked my paper to place the wheel and corner tape. I also laid the central strips of washi on wax paper and cut the center circle.
Check my blog Scrappin Chaos for a list of supplies as well as a Mandala tutorial.
   
Scrap On!

~charity~

Thursday, September 10, 2015

Little Duck Lost

Charity here from Scrappin' Chaos.
Over Memorial Weekend we found a duckling, alone and frantic in the middle of the road. We brought him home and after checking with the proper authorities prepared to raise him. Ducklings don't live well without siblings and this one only made it two days. This sweet baby nestled right into our hearts in that short time and it was hard to say goodbye.
~ Little Duck Lost ~
 To ease the sadness and encourage my kids to continue to do the right thing when they found a lost soul, I made them this memorial album.
 For the most part I took my color cues from my photo mats, a set of prints of Monet's work, all water themed. Love My Tapes has so many prints and shades of washi that I had no trouble embellishing the pages.
This little book has helped the kids memories fade into a sweet lesson on life and caring for others.
Check my blog Scrappin' Chaos for a list of Supplies.

Scrap On!

~charity~

Friday, September 4, 2015

Discover w/ Ange

 Hey! Ange here today and I've got a fun layout for you.
This sketch from My Scraps & More was just screaming for Love My Tapes!
So I put them to work on it:


 And my layout:


I pulled out a white piece of cardstock, grabbed my tapes and got busy.


I followed the sketch with the Brick tape, but I used 2 layers side by side to make it wider. Then I added the Colorful Bold Dots tape. After getting those on I decided to go off the sketch a bit and added my third strip out on it's own.


I took the Sky or Clouds w/ Love tape and laid it out on my cutting mat. Then I used a ruler and my cutting knife to slice it the long way. I took the thin strips and added them in each square of my layout. I did beveled corners because I like the way they look. 


To finish up, add some fun embellishments.
You can find all of these tapes and many, many more in the Love My Tapes store.
Thanks for stopping by!
:)Ange


Thursday, August 27, 2015

Tic Tac Tape

Charity here from Scrappin' Chaos.
Today I have a new twist on an old game.
It's quick to make and everybody loves playing,
~ Tic Tac Toe ~

The 16x16 cork board is pre-made from Michaels.
The letters are 4" chipboard.
I wrapped each letter in a different washi tape. Narrow tapes wrap a bit easier, but I was mostly concerned with variety of color and pattern so I made it work. Find these and MANY MORE patterns in the Love My Tapes Etsy store.
To be certain the tape stayed secure I laid more tape on the backs of the letters, running the opposite direction. I also painted the backs of the letters with dimensional adhesive.
Stop by my blog Scrappin' Chaos for a list of supplies.
Scrap On!

~charity~

Friday, August 21, 2015

Adventure lo w/ Ange

 Hello, Ange here to share this fun Friday with you.
Today I'm sharing a fall-ish looking layout that is about a camping trip my family took a couple years ago.
We had so much fun on this trip. My little guy was delighted to be out in nature enjoying the dirt and grime and new things he could get into.
I was watching him on the outskirts of our camp and taking some pictures to document "bigfoot" in the woods when he comes back to me with these pretty flowers he found.
Just for Mom.


Too sweet!
I started my layout with a kraft background then pulled out a pad of fall papers that would go perfectly with my woodsy photos.


I used the papers for a lot of layers and then used tape for accenting.


Here I used it to highlight a decorative element on my page by adding it behind the cardstock decoration.


Here I used it like stitching or staples as an element to connect one layer of papers to another.
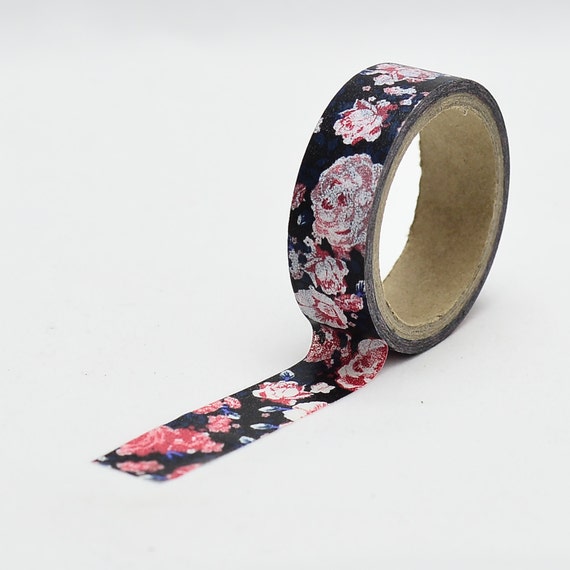
I used the Black Roses tape to go with this layout. I really like the look of having just bits of black tape here and there to accent my layout.
You can find this tape and so many more in the store. Check it out!
Thanks for stopping by! 

Thursday, August 13, 2015

Party Hat Blossoms

Charity here from Scrappin' Chaos.
I believe a lady always needs a party hat! 
If she makes it herself it can be as bright and flowery as she likes.
This hat was finished in just a couple hours.
~ Bloom ~
 To begin I made double sided strips of washi tape. The wide pink and the postal print I backed with black floral tape. For the pink and white washi I just used the same tape.
 The Pink flower and the Postal print flowers were made using individual loops. The tape was flexible yet solid. I stitched the ends together at the middle.
The small pink flowers are rolled ribbon roses.
There are several excellent tutorials on making ribbon roses posted on the internet. Double side your washi tape and get started making flowers!
Stop by my blog Scrappin' Chaos for a list of supplies.

Scrap On!  

~charity~

Sunday, August 9, 2015

Love My Tapes Design Team Call

It's time for another call.  We have had an amazing team of designers and we are sad to see a few of them move on.    Even though a few are staying for another term we need to still add to our team.  We are looking to add 5 more designers. 

If you are a fan of our products take a look at our call and we look forward to hearing from you.


If you have any questions send them to the same email address:  kimberlylovemyfabrics@gmail.com

Friday, August 7, 2015

Live in the Moment w/ Ange

 Hello, Ange here today and I have a fun card to share with you:


I started with a white base, added some fun patterned paper and then used this awesome brick tape to create a base for my sentiment.


I continued with it on the inside and then added a bit of this fun Heart Forest tape.
You can find these tapes and many more on the Love My Tapes website.
Thanks for stopping by!
:)Ange

Thursday, July 30, 2015

Ruby Slippers

Welcome back to the Love My Tapes Blog!
Charity here from Scrappin' Chaos with a summer sandal layout. 
 The main colors of this layout are red and craft.
I used washi tape to add pattern and color.
 Under the photo mat I looped black floral washi tape.
On either side of the cascade of red blossoms I used green filigree washi tape for leaves. To form the leaves I doubled the washi tape, shaped a loop, and used hot glue to tack it down.

Stop by the Etsy shop to find this and other washi tapes.
 Black with Pink Floral Washi Tape -Planner stickers - scrapbooking - card making - LMT 553- Love My Tapes 
Black with Pink Floral 

For a list of supplies see my blog, Scrappin' Chaos.

Scrap On!

~charity~ 

Wednesday, July 29, 2015

So Many Books, So Little Time layout

Hello Love My Tapes Fans!  I am back today to share a new layout.  I have had these patterned papers in my stash for a while now so I was pretty happy that I was able to grab some washi tape that looks great with the paper.


Here is a close up of the three rolls of tape that I used on this page.


I just wanted to take a second and thank this fabulous team and all of the fans for the fun time I have had as a part of this team.  I have decided to step down to focus on some other great and challenging things in my life.  It has been a great experience creating projects for this team.  I truly feel so lucky to have been a part of it.

Thanks for joining me today!
- Cassie - 

Tuesday, July 28, 2015

Live, Love and Enjoy Life!

Welcome Washi Tape fans!  
Susie here to share an all occasion card with an elegant black & white color scheme and a sentiment that I have come to embrace in my everyday life.

The washi tape that I used on this card may be found in the Love My Tapes Etsy store.
Wide Black and White Music Note Butterfly washi tape
 I started by covering white cardstock with strips of the washi tape.  
I cut it to size and rounded the corners before adding a crisp white doily.

The sentiment is from a set of clear stamps from Kaisercraft, which I stamped and heat embossed with black embossing powder.

I trimmed out the sentiment, inked the edges and adhered it to the front of the card, using foam tape adhesive to pop up the word "and" for a little dimension.  Finally I adhered the finished panel onto a black card and rounded the corners of it as well!

Thanks for stopping by and I hope you find some time to play (with washi tape) today!

Monday, July 27, 2015

Gooey w/ Ange

 Hello and happy Monday!
Ange here today to share some fun tapes with you.


It's super easy and fun to replace pp or design elements on your page with tapes.


Here I've used Mint w/ Love as a patterned paper element. I thought it would be great to represent how much my son enjoyed his smores. I've also used it along the top as a design element to highlight the title of my page.


I also used the skull tape to add a bit of rough and tumble to my layout w/o overwhelming it.
Thanks for stopping by and have a great week!
:)Ange

Sunday, July 26, 2015

Washi Stripes

Happy Sunday!

I hope your weekend has been wonderful so far.

Stacey here to share with you a card that I made using some of that awesome 
Washi Tape from Love My Tapes!


I used some Red & White 1158 and some Stripes Black & White washi tapes to create some fun stripes along the side and bottom of my card base. I then popped up my die cut with my image on some foam tape and added some enamel dots to finish off my card. 


Thank you so much for stopping by today!
You can find out more info on my card at my blog HERE.

You can see all the Love My Tapes products at their ETSY store HERE.

I hope you have a great crafty day!


Friday, July 24, 2015

Love you

Hey everyone, Michelle here today with my last DT project for Love My Tapes.  I've had so much fun working with these tapes the last few months.  The possibilities are endless and they really make crafting easy!

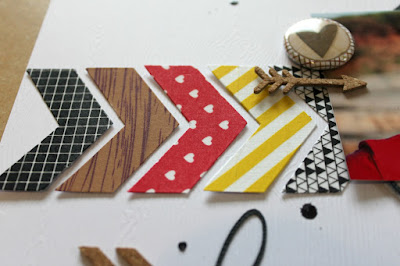
Today I'm sharing a LO.  I cut out some chevrons with my Silhouette Cameo and then I covered them with washi.  I really like the effect it created!


And some close ups!


Check out the Love My Tapes store for a wide variety of tapes! 


Thursday, July 23, 2015

Eat Cotton Candy With Friends

Hello Love My Tapes fans.  I am here today with a bright and colorful layout.  I know that I have used several of these patterns of tape lately.  I love how versatile these patterns and colors are for various projects.


When I first saw the mustache washi tape I knew it would be cute on this page, but it wouldn't stand out with all the other tape.  So I put the tape on a piece of patterned paper to create my own strip to accent my layout.


I wanted to add machine stitching on top of the tape and it worked beautifully.  I wasn't sure how the needle would do going through the tape, but there was no tearing of the tape.  It adds a subtle detail and some added texture on the layout.


Thanks for joining me today!
- Cassie - 

Monday, July 20, 2015

Happy Birthday card w/ Ange

Hey!
Ange here today and I have a super fun and easy card for you:


I started with a white base (but I'm thinking some color will be fun for the next one!) and lined up the awesome Happy Birthday tape on a diagonal.


On each side of that I put the yellow stars and then the blue stars and then to finish it off, a few white liquid pearls dots.
Easy and fun!

Have a great week,
:)Ange

Sunday, July 19, 2015

Disney Inspired Picture Frame

Hi Everyone!!
Kimberly from Kimberly's Crafty Spot.
Today I am sharing Disneyland inspired picture frame featuring some
Love My Tapes washi tapes.


Close-up of the frame with the washi tapes.
To cover my frame, I used several Love My Tapes washi tapes that I thought were
"Mouse/Disney inspired."
Yellowish Orange Chevron
Red and White
Black and White Stripes
Red Hearts
Cameras Black and White

I covered the frames with these tapes then gave the frame a few coats of Mod Podge Matte to seal the tapes to the frame. This didn't take long to dry and I don't need to worry about the tape coming off the frame. Then I added my die cuts to the outside of the frame with some foam adhesive to give them some dimension.
All done!


Love My Tapes Facebook page

Thanks for stopping by!

Check out my blog for all the details!
Have a wonderful day!