Hello! Tessa here. Our family is dressing up as superheroes for Halloween this year. The baby is Wonder Woman and her onesie couldn't be cuter. Well, actually, once she was dressed I realized she was missing some pretty important accessories - Wonder Woman's crown and cuffs! Love My Tapes to the rescue with their new, amazing glitter paper!
I drew the shape of her crown onto the back of the glitter paper, then cut it out with scissors. I used hot glue to apply it to a gold glitter headband. For the star, I made an epoxy star sticker with red glitter paper.
I made the cuffs by simply trimming out rectangles of gold glitter paper and adding more stars. I secured them to her sleeves with strong tape.
If you try something similar for your baby or young child, I strongly suggest that paper accessories are only worn in the presence of adults for safety. My baby girl is teething, which means eventually, she's going to try chewing on these cuffs.
Happy Halloween!
Monday, October 27, 2014
Saturday, October 25, 2014
Layout with washi tape embellishments
Hello Love My Tapes fans! This is Maya and today I will share a layout where I used three different washi tapes.
After my son's backpack reached it's end of life I cut out the piece with his name and decided to make a layout devoted to the backpack. I found 6 pictures with the backpack and arranged them in a simple grid.
I added a piece of green chevron and black chalkboard washi tapes to the corners of the layout. The title is cut with Silhouette Cameo from vinyl.
To finish the layout I added small hearts that were punched out of red chevron washi tape adhered to vellum.
That't it! Super simple and no embellishments needed!
Than you for stopping by today!
After my son's backpack reached it's end of life I cut out the piece with his name and decided to make a layout devoted to the backpack. I found 6 pictures with the backpack and arranged them in a simple grid.
I added a piece of green chevron and black chalkboard washi tapes to the corners of the layout. The title is cut with Silhouette Cameo from vinyl.
To finish the layout I added small hearts that were punched out of red chevron washi tape adhered to vellum.
That't it! Super simple and no embellishments needed!
Than you for stopping by today!
Friday, October 24, 2014
Halloween Stamp Camp
Hey everyone, Katie here! I wanted to share with you guys these projects I made recently at Stamp Camp. What's stamp camp? It's just a fun little "crop night" hosted by a friend of mine who is a Stampin' Up consultant.
We each made a card, 2 gift bags, and a little candy jar. I used the provided supplies but I also added bits of washi tape here and there to further embellish my projects!
I love the finished look that the washi tape gives all of these projects! Are you making a lot of fun Halloween crafts?
Wednesday, October 22, 2014
Day of the Dead
Hi Everybody!
*Love My Tapes - 12"x12" adhesive glitter sheets, lace tape
*Autumn Celebrations Cricut cartridge
*Hannah Montana Cricut cartridge
*plate
TFL, and hope everyone has a chance to craft today :)
Tuesday, October 21, 2014
Life is a Ride... enjoy it with Washi Tape!
Hello Love My Tapes friends! Marcia here today with an awesome layout to share with you using some Love My Tapes washi tape and the fabulous Basic Grey Second City collection from my October Clique Kit.
I love using washi tape to repeat patterns on my layout. When I saw the black circles on the houses in the pattern paper I thought this black and white polka dot washi tape would be perfect. Here are some close-ups...
A little washi in the corner says, Look at me...
I love to frame my photo with just a little washi. I even tucked some under that die cut.
Take a look at your pattern papers and try to find patterns you can repeat using some washi tape too.
Thanks for stopping by!
~Marcia
I love using washi tape to repeat patterns on my layout. When I saw the black circles on the houses in the pattern paper I thought this black and white polka dot washi tape would be perfect. Here are some close-ups...
A little washi in the corner says, Look at me...
I love to frame my photo with just a little washi. I even tucked some under that die cut.
Take a look at your pattern papers and try to find patterns you can repeat using some washi tape too.
Thanks for stopping by!
~Marcia
Monday, October 20, 2014
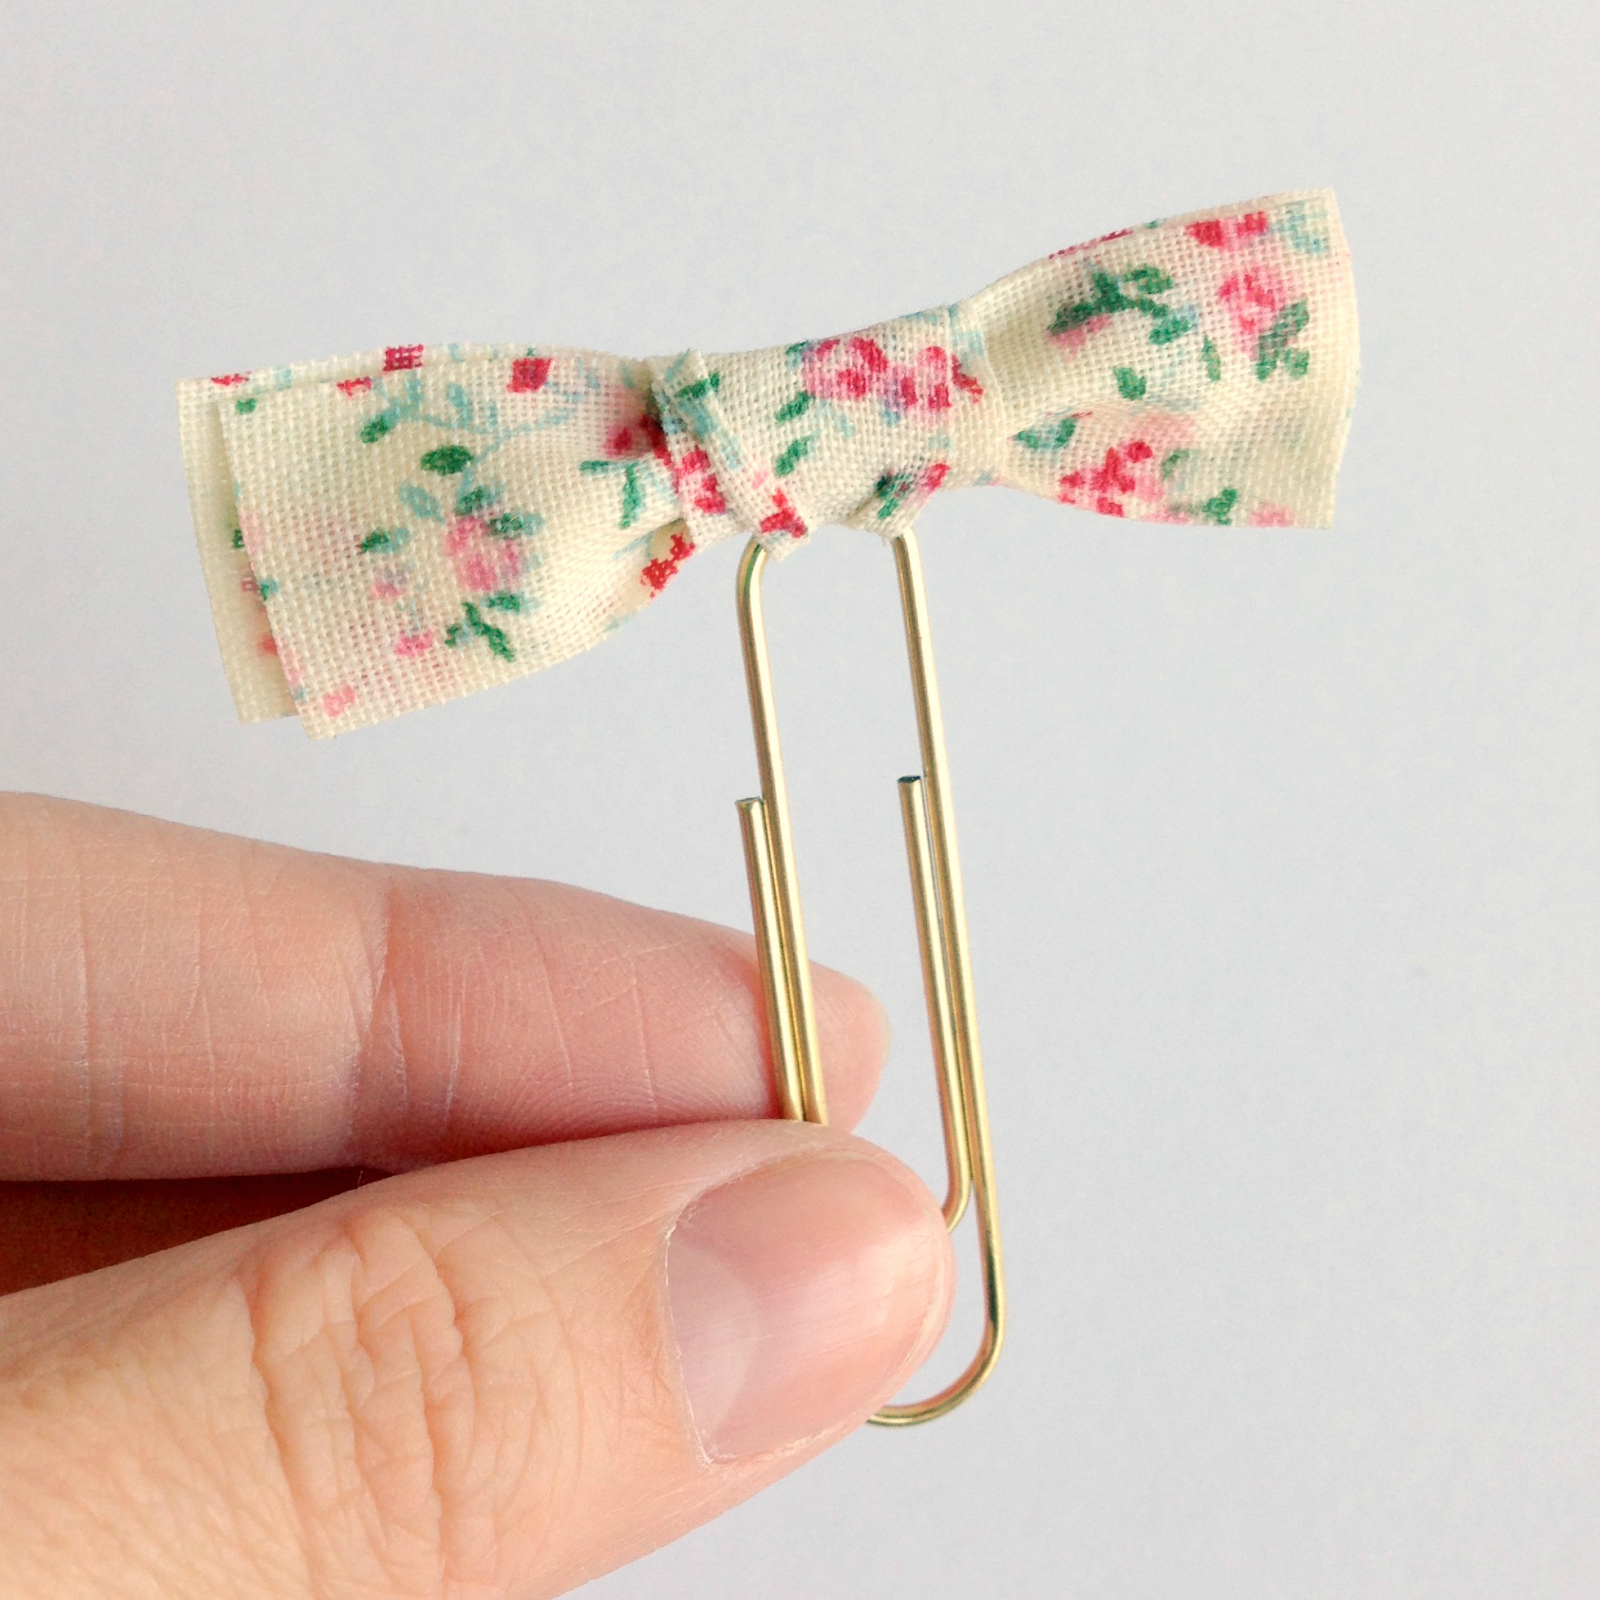
Fabric Tape Bow Paperclips
Hello! Tessa here with an easy tutorial for bow paper clips made with fabric tapes from Love My Tapes.
While you could easily use regular fabric for these, I love using fabric tape because it eliminates the need for sewing or gluing. To make your own, all you'll need is fabric tape and paper clips.
Step 1: Cut four equal pieces of fabric tape. I wanted my bow to be about 2 inches wide, so my pieces are that length.
Step 2: Remove the backing and place two pieces sticky sides together. Trim excess tape so that no adhesive is visible. Repeat with the other two pieces.
Step 3: Cut a piece of fabric tape at 0.75 inches and another at 1.25 inches.
Step 4: Remove the backing of the smaller piece. Pinch the middle of your bow with one hand, then use the other hand to wrap the small piece of tape around the bow.
Step 5: Remove the backing of the larger piece and thread it through a paper clip. Leave the front section of tape longer than the back.
Step 6: Starting with the back section of tape, secure the bow to the paper clip. Wrap the front section of tape back over the bow and press firmly to make sure the tape is secure.
You can use your paper clips as bookmarks, as embellishments on layouts and cards, to add tags to gifts, or just as cute office supplies. With Love My Tapes' wide selection of fabric tapes, you are sure to find a color palette you'll love. Thanks for visiting and have a great day!
While you could easily use regular fabric for these, I love using fabric tape because it eliminates the need for sewing or gluing. To make your own, all you'll need is fabric tape and paper clips.
Step 1: Cut four equal pieces of fabric tape. I wanted my bow to be about 2 inches wide, so my pieces are that length.
Step 2: Remove the backing and place two pieces sticky sides together. Trim excess tape so that no adhesive is visible. Repeat with the other two pieces.
Step 3: Cut a piece of fabric tape at 0.75 inches and another at 1.25 inches.
Step 4: Remove the backing of the smaller piece. Pinch the middle of your bow with one hand, then use the other hand to wrap the small piece of tape around the bow.
Step 5: Remove the backing of the larger piece and thread it through a paper clip. Leave the front section of tape longer than the back.
Step 6: Starting with the back section of tape, secure the bow to the paper clip. Wrap the front section of tape back over the bow and press firmly to make sure the tape is secure.
You can use your paper clips as bookmarks, as embellishments on layouts and cards, to add tags to gifts, or just as cute office supplies. With Love My Tapes' wide selection of fabric tapes, you are sure to find a color palette you'll love. Thanks for visiting and have a great day!
Thursday, October 16, 2014
Iris folding with fabric tape
Hello, Love My Tapes fans! This is Maya and today I am going to share a card I made using one of my favorite techniques - iris folding! Usually iris folding is done using folded pieces of paper but I used Love My Tapes fabric tapes and I am in love with the final look!
I used a coordinated trio of fabric tapes that come together in one package and also added blue water drops tape and a pretty floral one. I found the pattern for the umbrella girl on Pinterest. Just look for iris folding patterns, you will find the one that I used and many many others.
The adhesive on the back of the tapes really helps to hold everything together. I added a frame to the card base using another fabric tape that has a beautiful linen texture.
I colored the girl image with Fiber-Castell big brush markers and added a stamped sentiment.
Thank you for stopping by today! Have a great weekend!
- Maya
Subscribe to:
Posts (Atom)