Pages

Showing posts with label Polka Dots. Show all posts

Monday, May 18, 2015

Graduation cards w/ Ange Weisbeck

 Hello there! Ange here today with a couple of Graduation cards.
It tis the season after all!


I started with an older Graduation Day line from Moxxie, that I still have in my stash. What better way to spruce up an old line than to add NEW tapes right?!


I layered the Yellow and Blue Stars tapes on this card. 
They perfectly match our school colors!

For this card I picked 3 patterns from the yellows to match our school colors, then layered them on the base of my card before adding the embellishments.


Using the polka-dot, stripe and star tapes, I layered a strip and then cut each end into a banner for a little subtle detail.

I'm off to make some more graduation cards and using Love My Tapes makes it so easy!!
:)Ange

Monday, May 11, 2015

It's Your Day! card w/ Ange

 Ange here today. I hope you all enjoyed your weekend.
I have a last minute Mother's Day card to show you that could easily be adapted to almost any theme.


I started with a white base and pulled out these lovely colors of polka dot tapes.


I used the blue polka dot first and made some layers along the  bottom of my card.


Then I used a strip of the purple and lime along with another strip of the blue to make some banners in the top right corner. Then you have a wonderful, bright and fun base to build the rest of your card on!
Thanks for stopping by.
:)Ange

Sunday, January 25, 2015

Washi dot tutorial and shaker cards

Happy Sunday, LMT friends!  Hope your enjoying the end of a relaxing and crafty weekend.  It's Jaclyn here today to share with you a simple tutorial for creating a backdrop of washi dots on an interactive shaker card.  Here's a peek....


A close up shot, shows how the washi tape fills in the background on each circle while also remaining inside the shaker element.  Setting up the card this way allows the sequins and seed beads to float and move upon the surface of the washi dots for added interest and texture. 


How did I create this effect?  It was quite simple really!  Follow the steps below to create your own version.

I started with a standard A2 size card that was 4.25" x 5.5".  I cut a panel of cardstock that was a quarter of inch shorter on the height and length, as shown.  I then used a variety of sizes of circle dies to create a scattering of dots across my panel.  Note: be sure to leave at least a quarter of a inch between the dots, for easier placement of the washi tape later on.


Next, I lined up the panel on my A2 sized card, leaving an even border along all four sides.  I used a pencils to lightly trace each of the circles onto the card front.  This will allow for perfect placement of my washi tape.


The next step was to grab my stash of washi tape and start covering the penciled in circles on the card front.  I stuck to a gold and black color scheme, and pulled all of my tapes in that color family.  If you'd like to purchase these same tapes, you can now find them in our etsy shop!  Don't worry about how messy this step appears, because the panel you've previously diecut will cover up all of the rough edges and imperfections.  Just be sure to completely cover each circle and not overlap onto any nearby ones.


The final step is to create your shaker front.  I adhered a piece of an old page protector, that I cut to size, on the backside of my diecut panel.  This creates the window portion of the shaker.  Next you'll need to adhere foam adhesive along the perimeter of the panel, as shown.  The foam adhesive creates a pocket for which the shaker bits & pieces to move.  At this point, I usually carefully lay my sequins and beads onto my card front, and then remove the foam adhesive release paper, and adhere the front panel to the card.  If you've followed the steps correctly, it should line up just perfectly!


Here's one last look at the finished design! 


Thank you for joining me today on the LMT blog. 
 
If you missed the post from yesterday, you'll want to head on over to this post, to get yourself entered into the giveaway for a chance to win a bundle of our tapes and adhesive!


Tuesday, October 28, 2014

Glittery stars and washi tape


Hello LMT fans, it's Jaclyn here today.  Are you caught up in your scrapbooks?  I most certainly am not!  I just got around to scrapping my youngest son's preschool graduation pictures from back in May.  I'm glad I waited though, because LMT's new 12x12 adhesive backed glitter sheets, proved to be the perfect compliment to these pages!


I used a thin metal star die to cut a variety of stars from the black glitter paper.  They die cut through the paper so very easily.  I've mentioned this on the blog before but it's worth repeating - the glitter sheets do not 'shed'!  Oftentimes I avoid working with glitter because I hate the mess, but the LMT glitter sheets solve that issue!
 
 
As a bonus, I simply peeled off the release paper, to reveal an even sticky layer of adhesive that attached so nicely to my page.  Even adhering seamlessly to my textured cardstock background!


Lots of pictures on a page, sometimes means that I don't have a whole lot of space left for embellishment.  But washi tape can be squeezed in and layered just about anywhere.


Here I've used the black and white polka dot tape to look like several of the polaroids are 'taped' to the background.


Thanks for joining me today on the blog!  We'd love to hear how you're using the 12x12 glitter sheets on your crafting projects.  We hope you'll share with us and link up your projects in the comments!

Monday, October 15, 2012

More polka dots...


 Hello bloggers Rita Barakat here!
So how are you doing with your fall projects?
I have another fun seasonal card
with a little polka dots washi tape!
 
Image of washi tape #601
Gotta love it!
 

Monday, October 1, 2012

Hoot Hoot!

 
Hello bloggers Rita Barakat here!
Can you believe it's October already?
To kick off the month I have this fun seasonal card
with a little polka dots washi tape!
 
Image of washi tape #601
So what are you going to create?


Friday, September 28, 2012

Can You Spot the Washi??

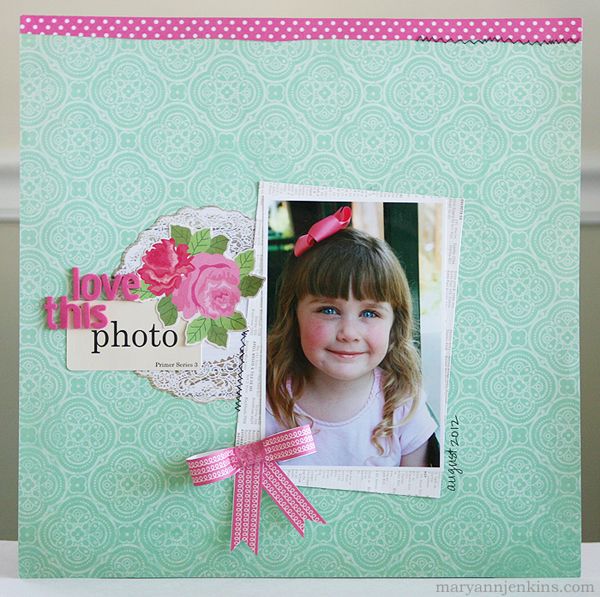
I know it looks like this layout is made up of patterned papers and stickers, but did you know there's washi on there too??
 
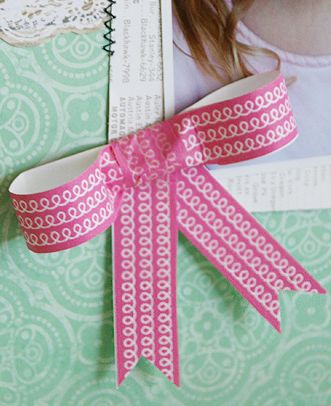
Although the cute bow looks like it's made of paper, it and the pink polka dot strip at the top are both made from washi tape! 
 
For the bow, I adhered a 12" long piece of washi tape to a small strip of white cardstock, this way the cardstock would help the washi keep it's 3-d dimension once it was cut and made into a bow. A few pieces of foam tape inside the loops of the bow will keep them from being flattened once the layout is in an album.
 
It's fun to see all the creative ways washi can be used!


Friday, July 13, 2012

Celebrate Summer!

What can you do with Die cuts? Color them of course!
I colored these fun popsicles spaces in with my colored pencils,
 making sure each ice cream it's own yummy color!
Of course no card is complete without a little ribbon and
Love My Tapes
always has every color you can imagine!
Here is the one I used...
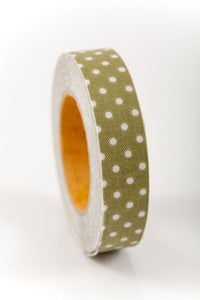
Image of 1 pk fabric tape - polka dots - jane - FT011
Nothing says summer like hot sunny days and cold ice cream!
Hope you are having a good one!