Today I have a card to share that uses a little "Pinspiration". I started with this cute card by fellow design team member Kathy, that is pinned to our card inspiration board.
I love the red and teal together, and wanted to follow her lead of hearts and strips of washi tape. Here is what I came up with...
I used the darling red washi with hearts across the top and bottom of my card, and then did a little machine stitching right on top.
I also cut the word hello with my silhouette, and then added the sweet little mason jar full of hearts.
Pinterest is such a great place to get ideas and inspiration. Thanks so much Kathy for inspiring me!
Showing posts with label Mary Ann Jenkins. Show all posts
Friday, March 8, 2013
Pinspiration!
Labels:
card,
Love My Tapes Washi Tape,
Mary Ann Jenkins,
Pinterest,
Washi
Friday, February 22, 2013
Pink & Red!
Have you seen this months Pink & Red challenge?? I thought I would play along too especially since pink is my favorite color. How's this for a little room decor!
I started with a simple $1.00 wood frame from my local craft store. I gave the frame a quick coat of white paint so the washi's with the white background would have a true white base. After the frame had completely dried, I picked some of my favorite pink and red washi tapes, and started layering!
I worked from the bottom edge of the frame to the top, and didn't worry about keeping the washi tapes in any particular order. I just rolled off a piece of tape and kept adding more and more. Originally I had planned to add a photo to the frame, but after I had it finished, I loved the look of just the washi covered frame.
This was such a quick and easy project to make and would be perfect to do with kids or as a party favor for guests to make and take home.
Thanks for stopping by today!
I started with a simple $1.00 wood frame from my local craft store. I gave the frame a quick coat of white paint so the washi's with the white background would have a true white base. After the frame had completely dried, I picked some of my favorite pink and red washi tapes, and started layering!
I worked from the bottom edge of the frame to the top, and didn't worry about keeping the washi tapes in any particular order. I just rolled off a piece of tape and kept adding more and more. Originally I had planned to add a photo to the frame, but after I had it finished, I loved the look of just the washi covered frame.
This was such a quick and easy project to make and would be perfect to do with kids or as a party favor for guests to make and take home.
Thanks for stopping by today!
Labels:
frame,
Love My Tapes Washi Tape,
Mary Ann Jenkins,
washi tape
Friday, February 15, 2013
A Layout to Share!
Hello and Happy Friday!
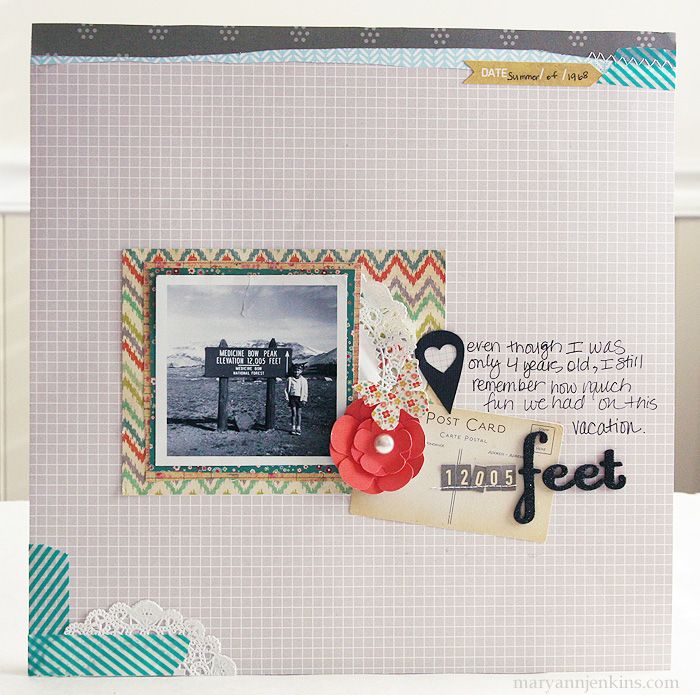
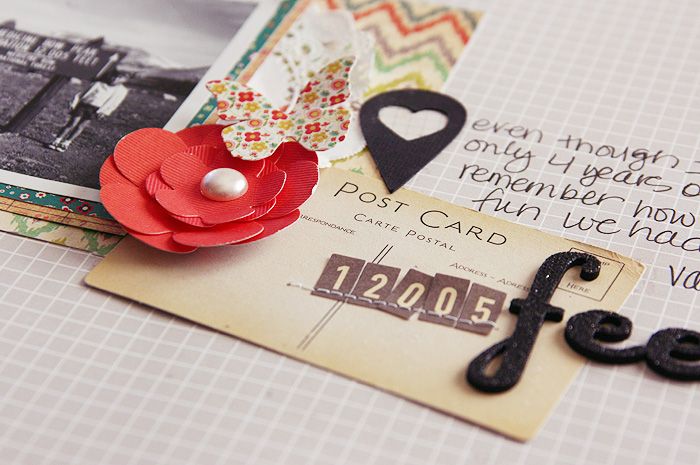
Today I have a layout to share using another one of my favorite washi tapes :)
Teal/turquoise and gray is such a great color combination, I love the mixing the two together!
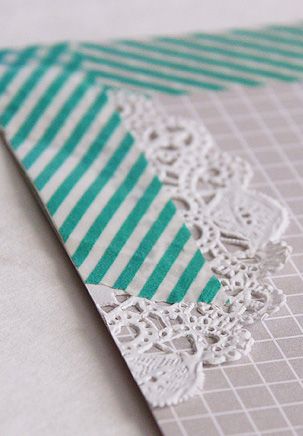
See that cute little doily I tucked in next to the photo? I wanted to add a little bit more on the layout, so I cut just a small piece, and layered it up with the washi at the bottom of my page. Love it!
Thanks for stopping by today, and enjoy your weekend!
Wednesday, January 9, 2013
How I Remember It
Hi friends, It's Mary Ann here today with some washi inspiration!
I love scrappin' old photos, I like looking back to a different time, a different place. Recently I've been working on pictures from my childhood, and even though I've hardly made a dent in the pile of photos, I'm having a great time reminiscing!
Here I am at age 3, in front of the playhouse my Dad had built for me.
I loved playing in that cute little playhouse!!
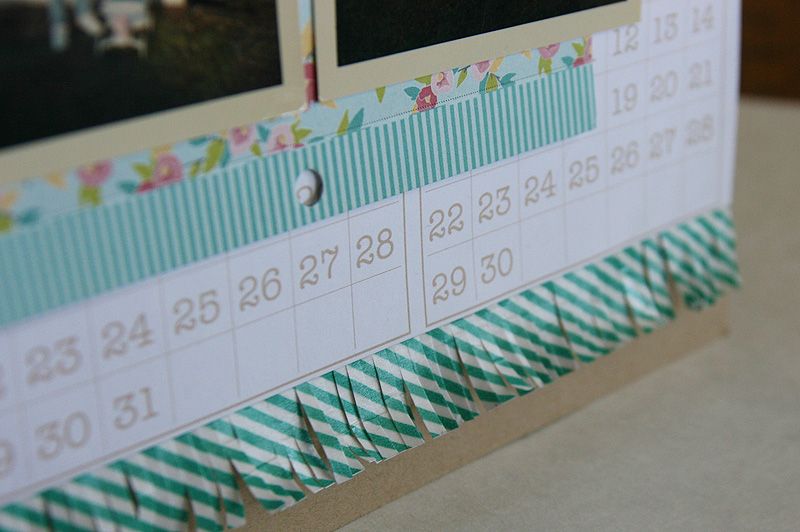
To add to the whimsical feel of the layout, I added a row of the diagonal stripe washi to a strip of white cardstock, then I used my Martha Stewart fringe scissors and cut all the way across the strip. I adhered the "fringe washi" to the kraft colored cardstock and then added the rest of the layers to complete may layout.
I love scrappin' old photos, I like looking back to a different time, a different place. Recently I've been working on pictures from my childhood, and even though I've hardly made a dent in the pile of photos, I'm having a great time reminiscing!
Here I am at age 3, in front of the playhouse my Dad had built for me.
I loved playing in that cute little playhouse!!
To add to the whimsical feel of the layout, I added a row of the diagonal stripe washi to a strip of white cardstock, then I used my Martha Stewart fringe scissors and cut all the way across the strip. I adhered the "fringe washi" to the kraft colored cardstock and then added the rest of the layers to complete may layout.
Thanks for joining me today here at Love My Tapes!
Monday, December 17, 2012
Pinspiration: Off the Page
It's Mary Ann with a project to share today that started with another project I found on the Love My Tapes Off The Page Pinterest Page. In Rita's original post, she used a paper sack as gift wrapping, and added washi tape to dress it up just a bit. I love the kraft color of the paper sacks, so I used them too for a little Christmas surprise I wanted to make.
This idea has been around for awhile and I've seen many versions of the poem, but this one is my favorite!
I started with a sandwich size bag, filled it with uncooked oats, then added in
gold and red colored cake sprinkles.
Next I cut a circle from the front part of a brown paper sack, then added the bag of food. I folded the top of the sack over, and stapled so it would stay together, and hold the bag of reindeer food, then added a strip of washi tape to cover the staples. I typed the cute poem on a tag, added a strip of washi and used a paper punch. To finish it off, I made a small medallion out of the washi tape (I added the washi to a strip of cardstock before folding), a larger medallion out of patterned paper then added the fun reindeer sticker. Of course the reindeer needed a red rhinestone nose! I can't wait until Christmas eve to see this sprinkled all over our yard ;)
Here is the poem in case you want to make your own Reindeer Food!
This idea has been around for awhile and I've seen many versions of the poem, but this one is my favorite!
I started with a sandwich size bag, filled it with uncooked oats, then added in
gold and red colored cake sprinkles.
Next I cut a circle from the front part of a brown paper sack, then added the bag of food. I folded the top of the sack over, and stapled so it would stay together, and hold the bag of reindeer food, then added a strip of washi tape to cover the staples. I typed the cute poem on a tag, added a strip of washi and used a paper punch. To finish it off, I made a small medallion out of the washi tape (I added the washi to a strip of cardstock before folding), a larger medallion out of patterned paper then added the fun reindeer sticker. Of course the reindeer needed a red rhinestone nose! I can't wait until Christmas eve to see this sprinkled all over our yard ;)
Here is the poem in case you want to make your own Reindeer Food!
Be sure to take this MAGIC FOOD
and sprinkle on the lawn,
on Christmas, Santa's Reindeer
travel miles before the dawn.
The smell of oats
and glitter path
will guide them on their way
and you'll wake up
to Santa's gifts next morn
on Christmas Day!
Thanks for stopping by today!
Labels:
Altered projects,
Christmas,
Christmas projects,
Love My Tapes Washi Tape,
Mary Ann Jenkins,
off the page,
Pinterest,
washi tape
Wednesday, November 28, 2012
Hints & Tips and Nov. Challenge Winner!
Hi friends! It's Mary Ann here today with a card to share, and a hint for storing your washi tape.
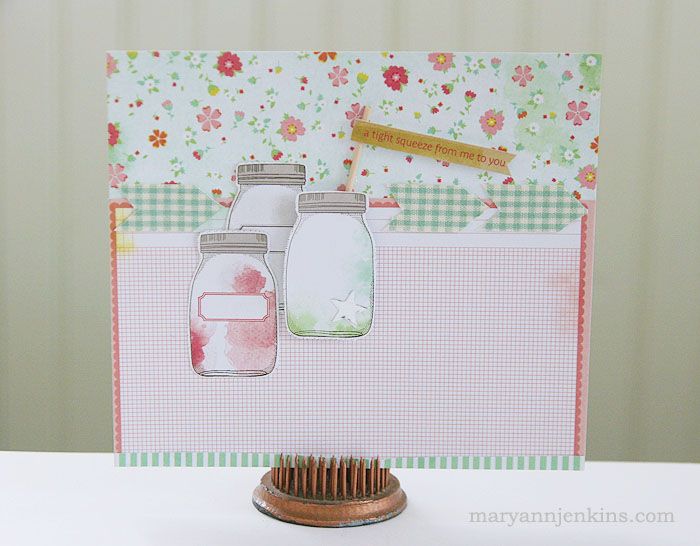
First up, here's a fun little card where I used fabric tape to make the cute arrow embellishments.
Since the fabric tape has a paper backing, I actually drew my arrow on the back, then cut out.
And now for my washi tape storage hint...
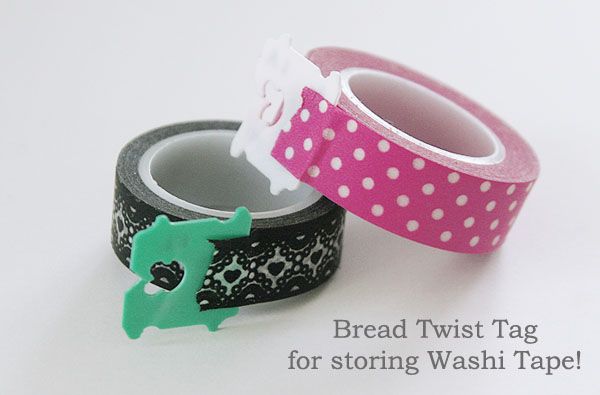
I love using washi tape on my projects, but I don't like when I can't find the end of the roll, or struggle with peeling up the end of the tape. For those of you with acrylic nails, it's even harder to do. Here's a handy solution...
Add a Bread Twist Tag to the end of the roll! It makes it easy to spot the end of the roll, and easy to unroll the tape too.
Thank you to all the participants for our November Challenge - Sketches! We loved seeing your creations!
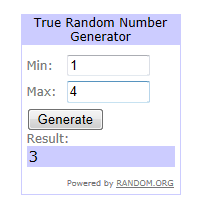
The winner of the November Challenge is:
Julie Thibodeau!!
Please send an email to lovemytapesdt@hotmail.com with your shipping details!
Thanks so much for stopping by Love My Tapes today!
First up, here's a fun little card where I used fabric tape to make the cute arrow embellishments.
Since the fabric tape has a paper backing, I actually drew my arrow on the back, then cut out.
And now for my washi tape storage hint...
I love using washi tape on my projects, but I don't like when I can't find the end of the roll, or struggle with peeling up the end of the tape. For those of you with acrylic nails, it's even harder to do. Here's a handy solution...
Add a Bread Twist Tag to the end of the roll! It makes it easy to spot the end of the roll, and easy to unroll the tape too.
Thank you to all the participants for our November Challenge - Sketches! We loved seeing your creations!
The winner of the November Challenge is:
Julie Thibodeau!!
Please send an email to lovemytapesdt@hotmail.com with your shipping details!
Thanks so much for stopping by Love My Tapes today!
Labels:
card,
Design Team,
fabric tape,
Mary Ann Jenkins,
washi tape
Friday, November 23, 2012
November Sketch Challenge
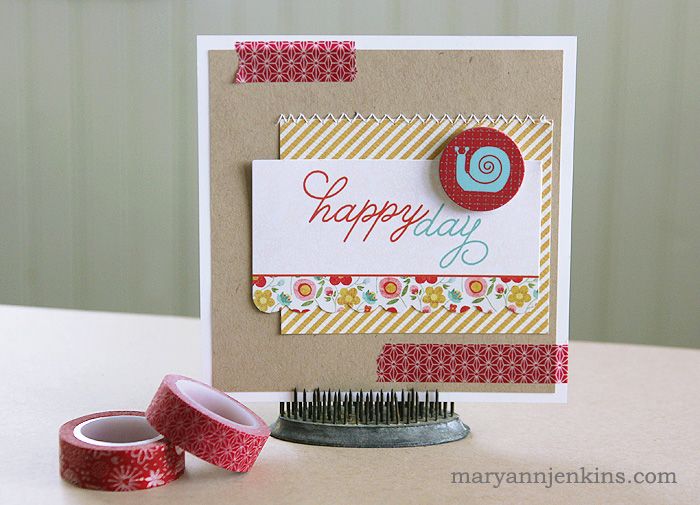
Hi friends!! We're almost to the end of November and have just a few days left for you to enter the November Sketch Challenge. The sketch this month was made by our very own Design Team member Ashley, and can be used to for a layout or card : ) I really struggle with making cards, so I used the sketch to help me along.
I followed the basic design, keeping the square shape and adding the washi tape to the top left and bottom right corners.
I used the diagonal stripe paper instead of the paper strips, and replaced the arrows with some machine sewing. I love how my card turned out, and have an envelope all ready to send it off in today's mail!!
Thanks for stopping by, and be sure to share your Sketch Challenge projects HERE. You could win some Love My Tapes goodies!!!
I followed the basic design, keeping the square shape and adding the washi tape to the top left and bottom right corners.
I used the diagonal stripe paper instead of the paper strips, and replaced the arrows with some machine sewing. I love how my card turned out, and have an envelope all ready to send it off in today's mail!!
Thanks for stopping by, and be sure to share your Sketch Challenge projects HERE. You could win some Love My Tapes goodies!!!
Labels:
card,
Challenge,
Mary Ann Jenkins,
Sketch,
Sketch Challenge,
washi tape,
Washi Tapes
Friday, November 9, 2012
A Washi Christmas
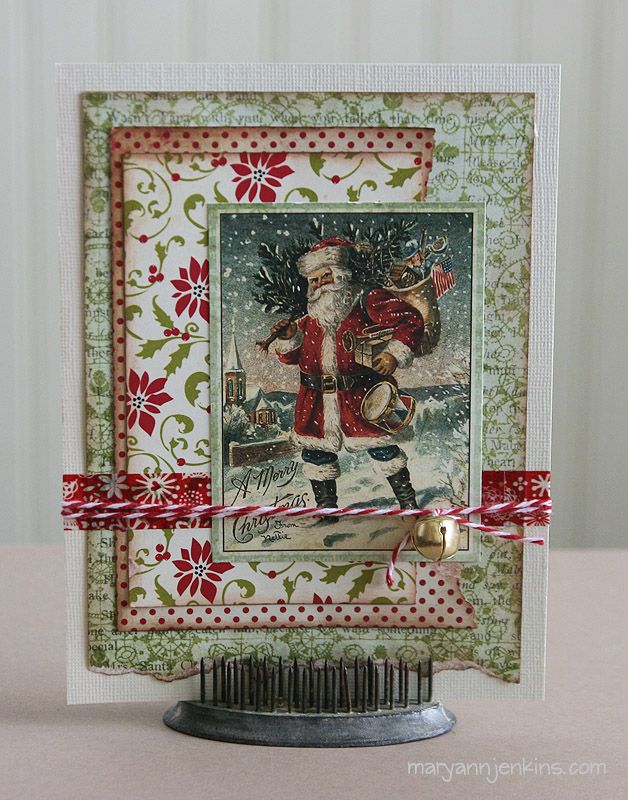
Hi friends! It's Mary Ann here to share a Christmas card, made with papers from my stash (I love when I can do that!) and my favorite red washi tape.
After layering each of the different patterned papers, I added a strip of the washi tape, twine and a cute jingle bell, then glued it to the card base. I really like how this turned out, and really like how quick and easy it was to make!
Thanks for stopping by today, enjoy your Friday, and have great weekend!
After layering each of the different patterned papers, I added a strip of the washi tape, twine and a cute jingle bell, then glued it to the card base. I really like how this turned out, and really like how quick and easy it was to make!
Thanks for stopping by today, enjoy your Friday, and have great weekend!
Labels:
card,
Christmas,
Mary Ann Jenkins,
Washi Tapes
Tuesday, October 30, 2012
Love My Tapes + Authentique Paper = AMAZING!
LOVE MY TAPES & AUTHENTIQUE PROJECT INSPIRATION
FALL BLOG HOP
FALL BLOG HOP
Love My Tapes and Authentique Paper are getting crafty over the next couple of days to bring you tons of inspiration using Love My Tapes and Authentique Paper!
To get you into the holiday spirit, we will be sharing projects from the LMT DT on the Love My Tapes blog, and the Love My Tapes Design Team will be sharing additional projects with you on their blogs with a Fall Blog Hop.
Be sure and stop back every day this week for more Love My Tapes/Authentique inspiration!
Today, we will be sharing a couple of layouts by the LMT DT.
First up is Rita. She combined several of our favorite collections – 'Genuine' by Authentique and the ‘With Love’ Washi Tape by Love My Tapes. Don’t these look fabulous together?
Next up is Mary Ann.
She is getting us ready for Halloween tomorrow with a fantastic layout, featuring herself. :) Isn't she sweet? She combined the wonderful Halloween collection, 'Enchanted', and the 'Black Lace' washi tape by Love My Tapes.
Here's what Mary Ann had to say about her layout...
I just love the Enchanted collection from Authentique, and especially love how well it worked with these "vintage" photos from 1970, and the vintage looking washi tape! I did some layering with the cute stickers, and added in a strip of washi behind my photos. Truth be told, I was too afraid that year to go trick-or-treating, so the night before Halloween I had some of the neighborhood kids over to carve pumpkins. It's definitely a Halloween I want to remember, so I added a little pocket to the back of the layout and included the story about Halloween the year I was 6 years old. Oh the memories
That is just a warm up. Hopefully you are ready for some more Love My Tape and Authentique ispiration. Let’s start the HOP. Shall we?
Be sure to stop by all blogs for a chance to win some Love My Tape goodies.
Annette Allen http://myclevercreations.blogspot.com/ (START HERE)
Ashley Horton http://www.ashleyhortondesigns.com/
Kathy Martin http://card-blanc.blogspot.com/
Mary Ann Jenkins http://www.maryannjenkins.com/
Rita Barakat http://letsembellish.blogspot.com/
Tina Walker http://adogslife-thirteen.blogspot.com/
Love My Tapes blog http://lovemytapes.blogspot.com/
After you have checked out the projects on the DT blogs, be sure to head on stop back here on the Love My Tapes blog and leave a comment for a chance to win some fabulous Love My Tape product!
Still need more inspiration? Stop by the AuthentiquePaper blog to find out what the talented members of their Design Team have in store for you today!
The Love My Tapes Fall Blog Hop will continue until Thursday night (11/1) at midnight. Be sure to stop by the LMT blog every day for more projects and inspiration from the DT.
Thanks for taking the time to stop by!
Labels:
Authentique,
Blog Hop,
Layouts,
Mary Ann Jenkins,
Rita Barakat,
Rita Barakat DT,
Washi Tapes
Friday, October 26, 2012
Washi to the Rescue!
Hi friends, it's Mary Ann here with you today!
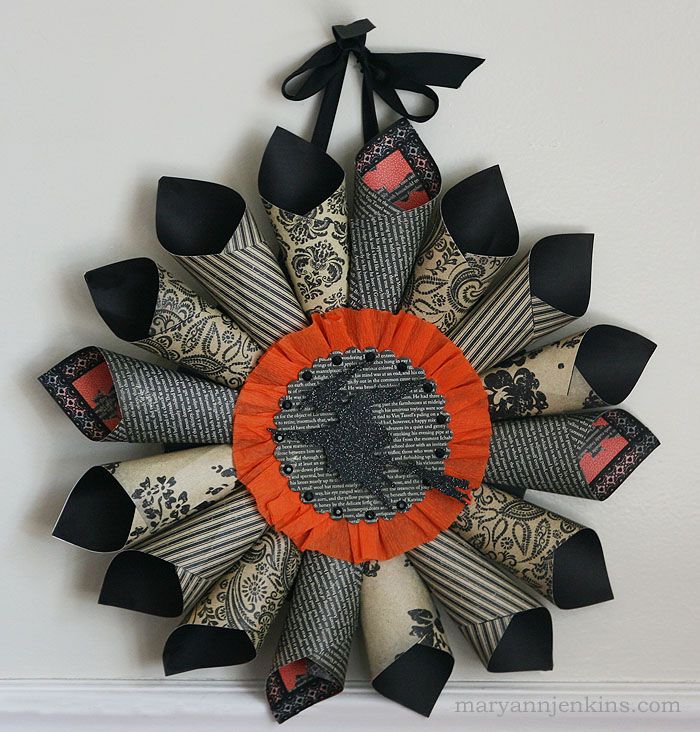
I've been seeing these really cute wreaths made out of patterned paper, and wanted to make one too. I started with the design I would use in the center, finished it, set it aside and went on to the actual wreath part. I had everything all ready to put together and realized the orange in my papers did not go with the orange crepe paper in the center piece. Now what? Washi to the rescue!!!
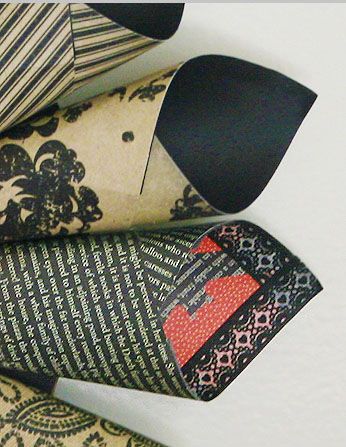
To tone down the orange on my patterned paper pieces, I added a strip of washi to cover some of the orange color. It made such a difference, and looked like I had planned it from the beginning!! Just one more reason to love the washi tape ;)
All in all, for being the first wreath I've made, it turned out pretty cute! I may even try making another one at Christmas time.
Thanks for stopping by, and have a great weekend!
I've been seeing these really cute wreaths made out of patterned paper, and wanted to make one too. I started with the design I would use in the center, finished it, set it aside and went on to the actual wreath part. I had everything all ready to put together and realized the orange in my papers did not go with the orange crepe paper in the center piece. Now what? Washi to the rescue!!!
All in all, for being the first wreath I've made, it turned out pretty cute! I may even try making another one at Christmas time.
Thanks for stopping by, and have a great weekend!
Labels:
Altered projects,
Mary Ann Jenkins,
Washi Tapes
Monday, October 22, 2012
It's Halloween Time!
It's Mary Ann here today with a cute gift that's quick and easy to make!
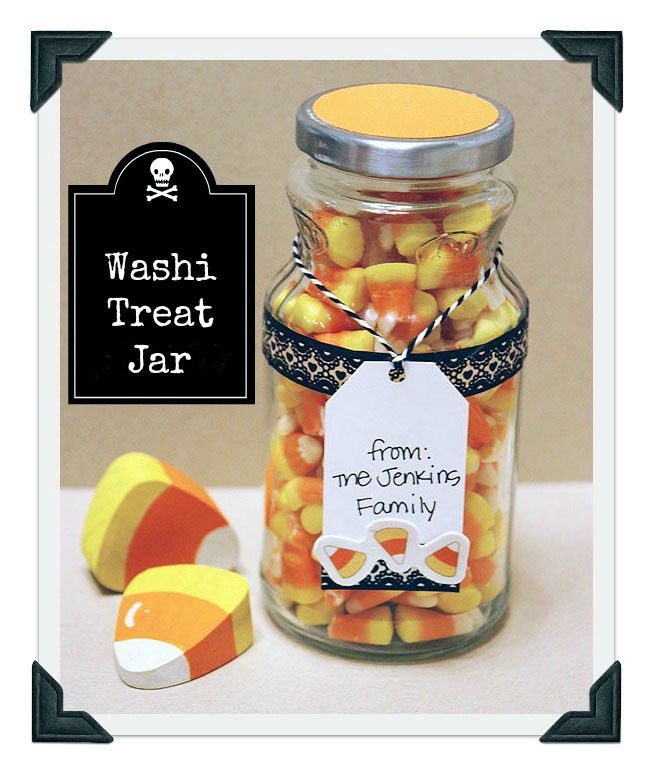
To start, I filled a glass (La Victoria Salsa) jar with candy corn. Next I punched a cardstock circle to cover the top of the lid. I cut a cardstock tag and added a small strip of Washi Tape, a sticker and piece of twine to the tag. I finished by adding a piece of Washi tape to the jar. A perfect little gift for a friend!
Start saving those jars, wouldn't this be cute at Christmas with red and green m&m's!
Thanks for stopping by, we love to inspire!
Labels:
Halloween,
Mary Ann Jenkins,
washi tape,
Washi Tapes
Monday, October 8, 2012
Dream Big!
To make the cute banner pieces, I first added the washi tape to strips of white cardstock, then notched the ends before adding behind the dream big sticker. I like how the washi gives it a bit of dimension ;)
Thanks so much for stopping by Love My Tapes, we love to inspire!
Labels:
card,
Design Team,
Love My Tapes,
Mary Ann Jenkins,
washi tape,
Washi Tapes
Friday, September 28, 2012
Can You Spot the Washi??
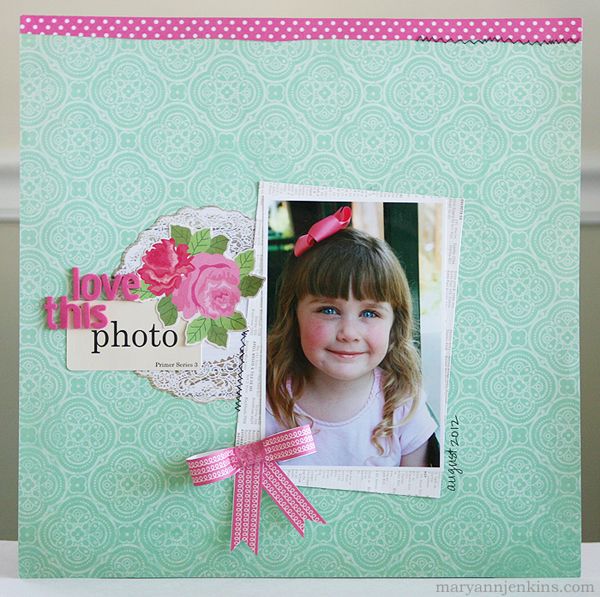
I know it looks like this layout is made up of patterned papers and stickers, but did you know there's washi on there too??
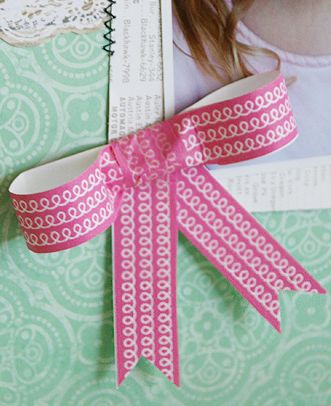
Although the cute bow looks like it's made of paper, it and the pink polka dot strip at the top are both made from washi tape!
For the bow, I adhered a 12" long piece of washi tape to a small strip of white cardstock, this way the cardstock would help the washi keep it's 3-d dimension once it was cut and made into a bow. A few pieces of foam tape inside the loops of the bow will keep them from being flattened once the layout is in an album.
It's fun to see all the creative ways washi can be used!
Labels:
layout,
Layouts,
Mary Ann Jenkins,
Polka Dots,
washi tape
Wednesday, September 19, 2012
Fabric Tape Fun!
Hi everyone! It's Mary Ann here today with a layout using fabric tape.
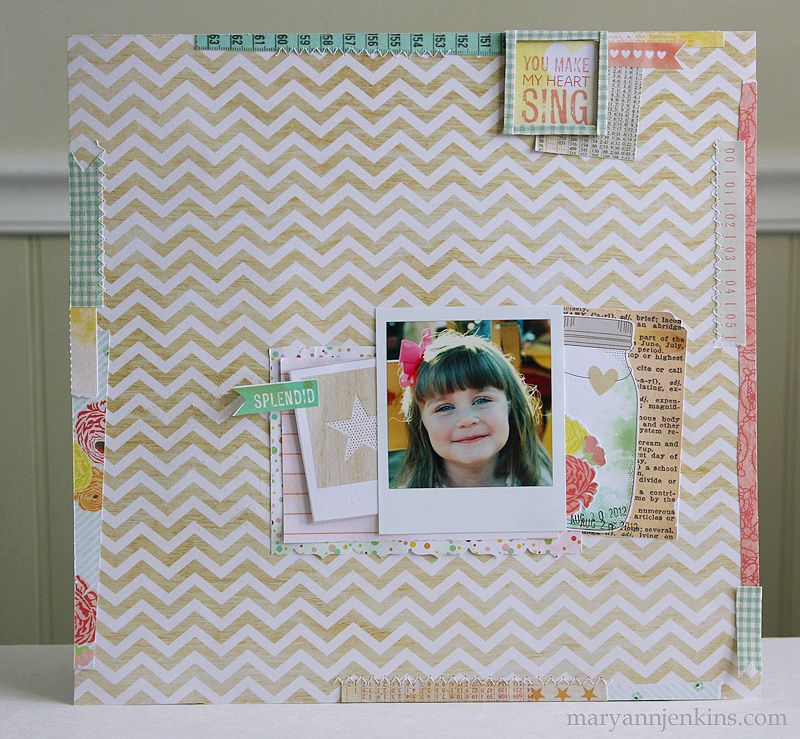
I used the sherbet mini check fabric tape along the border, and used it to the cover the wood veneer frame.
I love how the tape looks on the frame, and because the fabric tape is self adhesive, it was so easy! I just laid pieces of the tape all around the frame and cut off the excess. A perfect page accent.
Thanks for stopping by today, we love to inspire!
Mary Ann
I used the sherbet mini check fabric tape along the border, and used it to the cover the wood veneer frame.
I love how the tape looks on the frame, and because the fabric tape is self adhesive, it was so easy! I just laid pieces of the tape all around the frame and cut off the excess. A perfect page accent.
Thanks for stopping by today, we love to inspire!
Mary Ann
Labels:
fabric tape,
layout,
Love My Tapes,
Mary Ann Jenkins
Subscribe to:
Posts (Atom)