Hello Love My Tapes friends! Marcia here today with an awesome layout to share with you using some Love My Tapes washi tape and the fabulous Basic Grey Second City collection from my October Clique Kit.
I love using washi tape to repeat patterns on my layout. When I saw the black circles on the houses in the pattern paper I thought this black and white polka dot washi tape would be perfect. Here are some close-ups...
A little washi in the corner says, Look at me...
I love to frame my photo with just a little washi. I even tucked some under that die cut.
Take a look at your pattern papers and try to find patterns you can repeat using some washi tape too.
Thanks for stopping by!
~Marcia
Tuesday, October 21, 2014
Monday, October 20, 2014
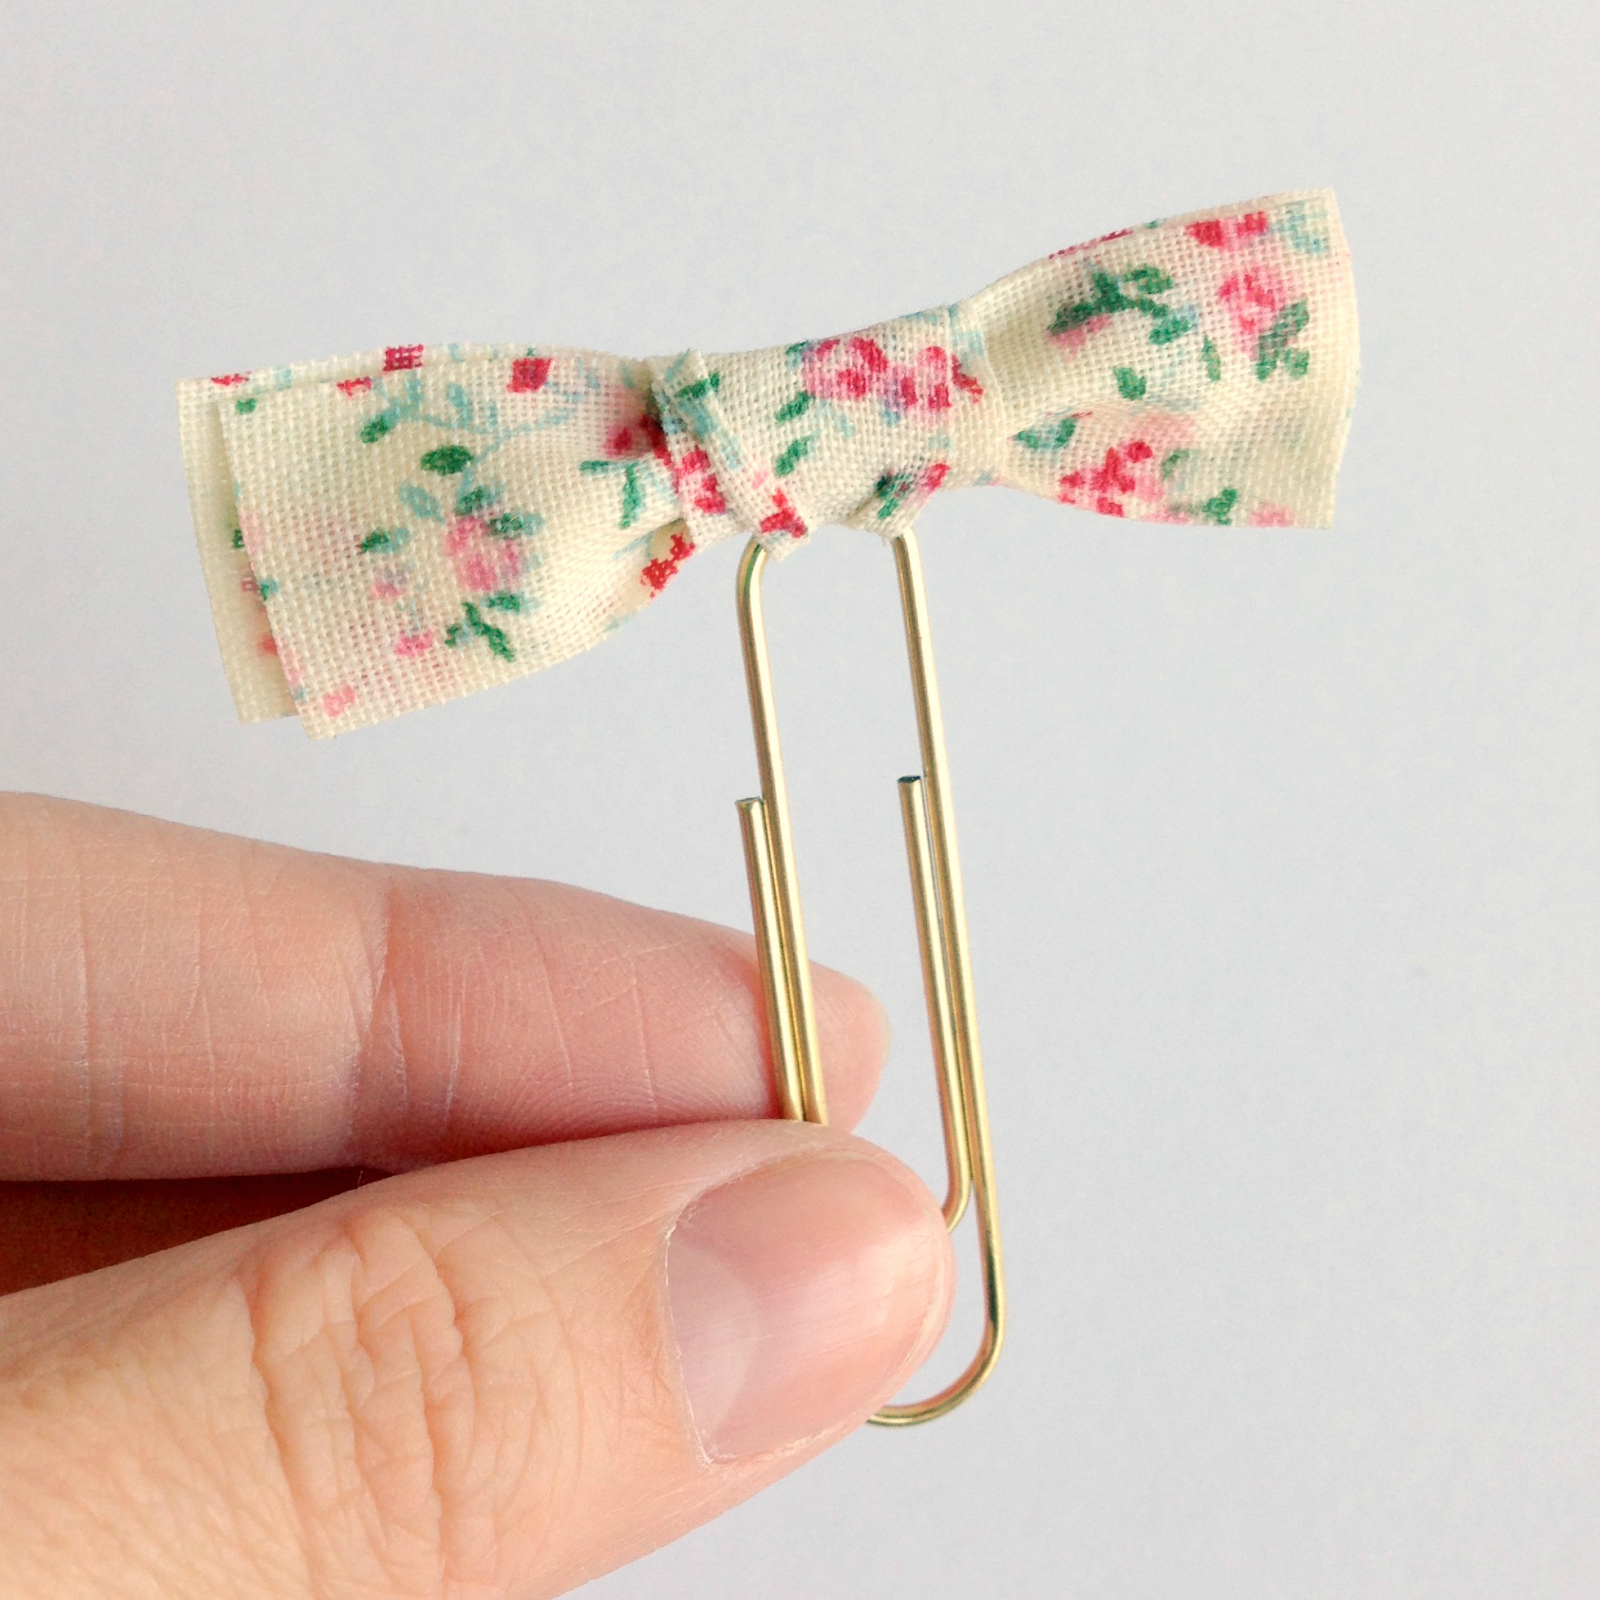
Fabric Tape Bow Paperclips
Hello! Tessa here with an easy tutorial for bow paper clips made with fabric tapes from Love My Tapes.
While you could easily use regular fabric for these, I love using fabric tape because it eliminates the need for sewing or gluing. To make your own, all you'll need is fabric tape and paper clips.
Step 1: Cut four equal pieces of fabric tape. I wanted my bow to be about 2 inches wide, so my pieces are that length.
Step 2: Remove the backing and place two pieces sticky sides together. Trim excess tape so that no adhesive is visible. Repeat with the other two pieces.
Step 3: Cut a piece of fabric tape at 0.75 inches and another at 1.25 inches.
Step 4: Remove the backing of the smaller piece. Pinch the middle of your bow with one hand, then use the other hand to wrap the small piece of tape around the bow.
Step 5: Remove the backing of the larger piece and thread it through a paper clip. Leave the front section of tape longer than the back.
Step 6: Starting with the back section of tape, secure the bow to the paper clip. Wrap the front section of tape back over the bow and press firmly to make sure the tape is secure.
You can use your paper clips as bookmarks, as embellishments on layouts and cards, to add tags to gifts, or just as cute office supplies. With Love My Tapes' wide selection of fabric tapes, you are sure to find a color palette you'll love. Thanks for visiting and have a great day!
While you could easily use regular fabric for these, I love using fabric tape because it eliminates the need for sewing or gluing. To make your own, all you'll need is fabric tape and paper clips.
Step 1: Cut four equal pieces of fabric tape. I wanted my bow to be about 2 inches wide, so my pieces are that length.
Step 2: Remove the backing and place two pieces sticky sides together. Trim excess tape so that no adhesive is visible. Repeat with the other two pieces.
Step 3: Cut a piece of fabric tape at 0.75 inches and another at 1.25 inches.
Step 4: Remove the backing of the smaller piece. Pinch the middle of your bow with one hand, then use the other hand to wrap the small piece of tape around the bow.
Step 5: Remove the backing of the larger piece and thread it through a paper clip. Leave the front section of tape longer than the back.
Step 6: Starting with the back section of tape, secure the bow to the paper clip. Wrap the front section of tape back over the bow and press firmly to make sure the tape is secure.
You can use your paper clips as bookmarks, as embellishments on layouts and cards, to add tags to gifts, or just as cute office supplies. With Love My Tapes' wide selection of fabric tapes, you are sure to find a color palette you'll love. Thanks for visiting and have a great day!
Thursday, October 16, 2014
Iris folding with fabric tape
Hello, Love My Tapes fans! This is Maya and today I am going to share a card I made using one of my favorite techniques - iris folding! Usually iris folding is done using folded pieces of paper but I used Love My Tapes fabric tapes and I am in love with the final look!
I used a coordinated trio of fabric tapes that come together in one package and also added blue water drops tape and a pretty floral one. I found the pattern for the umbrella girl on Pinterest. Just look for iris folding patterns, you will find the one that I used and many many others.
The adhesive on the back of the tapes really helps to hold everything together. I added a frame to the card base using another fabric tape that has a beautiful linen texture.
I colored the girl image with Fiber-Castell big brush markers and added a stamped sentiment.
Thank you for stopping by today! Have a great weekend!
- Maya
Wednesday, October 15, 2014
Canning Lid Pumpkin with Washi Tape!
I LOVE this! And since I did not can very many tomatoes this year, I thought ... Hey, I have canning lids! You would not believe how easy these are to make. You could do it in 10 minutes. There is a tutorial on YellowBlissRoad, but basically you just tie the lids together with string.
I decided some orange washi tape on those lids would be a fabulous addition. I covered each lid with this gorgeous orange chevron washi before stringing the lids together. Here is my washi tape canning lid pumpkin...
Gorgeous Right!!
I used 24 canning lids for my pumpkin and not even one roll of washi tape in case any of you would like to make one too ;)
Thanks for stopping by. Have a great week!
~Marcia
Tuesday, October 14, 2014
"Coffee and Books" Floral Notebook
Hey everyone, Katie here! Today I wanted to share this notebook I made using some of the new Love My Tapes washi I got recently. I felt that these 3 washi tapes really went together well, I like the colors.
To restyle this small notebook, I just covered the front in washi tapes. It really couldn't be ANY easier.
This is actually a gift for a friend who loves both coffee and books so I painted "Coffee and Books" onto the front over the washi in white and added shadows using a black glaze pen to make it stand out on the washi.
This is a birthday present, but just think how cute and easy these would be for Christmas presents!!
Thanks for reading! *hugs* -Katie
Friday, October 10, 2014
Baked goods and pretty tapes
Hi LMT fans, it's Jaclyn here today. Please tell me I am not alone in the fact that the cooler temperatures immediately put me in the mood to bake. Anyone else have this 'problem'? Something about pulling out the jeans, boots and sweaters initiates my craving for everything pumpkin flavored, warm and delicious. Since the temperature has barely reached 50 degrees where I live within the past several days, I've succumbed to baking six loaves of pumpkin bread and four dozen snickerdoodle cookies! I admit, its a problem! Ha! But it would be even more of a problem, if I ate it all myself! Luckily I have many friends and neighbors who appreciate my kitchen whims and are happy to indulge in surprise packages of goodies on their porch.
What does any of this have to do with the pretty tapes you come to see on this blog? Well, just as I mentioned in my post last week, I often reach for my supply of tapes to pretty up my baked goods packaging prior to passing them along!
LMT is now providing you with awesome 12x12 adhesive-backed glitter sheets! To keep with the Halloween theme, I used the black glitter cardstock to accent my cardstock wraps, as a base for my 'tape bows' and I even used a bit along the bottom edge of each tag.
What does any of this have to do with the pretty tapes you come to see on this blog? Well, just as I mentioned in my post last week, I often reach for my supply of tapes to pretty up my baked goods packaging prior to passing them along!
I've been gifting loaves up pumpkin bread like crazy. I found these cute kraft and orange polka dot boxes at my local craft store. While cute and decorative, they definitely needed to be dressed up! I created a simple black cardstock wrap, to extend around the outside of each bread box. At this point, I dug into my tape stash, wrapping some around the perimeter of each box and making darling, dimensional bows with the rest.
LMT is now providing you with awesome 12x12 adhesive-backed glitter sheets! To keep with the Halloween theme, I used the black glitter cardstock to accent my cardstock wraps, as a base for my 'tape bows' and I even used a bit along the bottom edge of each tag.
The glitter sheets have a super strong adhesive, so there's no worry that they'll move once you have them stuck down. What I also love about these sheets is they are no mess! I punched, trimmed and cut various pieces from the black glitter sheet, and didn't have a strand of stray glitter anywhere on myself or my work surface!
That's all I've got for today, LMT friends. Enjoy your weekend! We hope you'll come back and visit us next week. The Design Team girls all received a bounty of new LMT products and we're eager to share the fun things we've been making with them, with you!
Thursday, October 9, 2014
Glitter paper garland
Hello Love My Tapes fans! This is Maya and today I am going to share a sparkly paper garland.
We are in the midst of the Jewish holiday Sukkot where we build a small hut (sukkah) in our backyards and eat our meals inside the sukkah. One of the best part of the holiday is the decoration. The sukkah is often decorated with fruits, flag and garlands.
I used the brand new 12x12 glitter cardstock from Love My Tapes. For my first garland I punched two sizes of circles (make sure you use a heavy duty punch) and sandwiched a piece of string between two circles. The cardstock has an adhesive on the back so I didn't have to worry about the edges coming apart.
For my second garland I divided the 12x12 sheet into 2x2 squares and further divided them into triangles.
I cut the triangles apart and sandwiched a piece of string between two triangles. This can be a great craft for kids and actually my daughter helped me to finish the garland.
We will hang our garlands in our sukkah and they will bright our holiday meals for the next week.
My 6 years old was so mesmerized by all the sparkles that I had a hard time keeping him out of the pictures. I consider that as success :)
Thank you for stopping by today! Have a sparkly weekend!
Subscribe to:
Posts (Atom)