Pages

Showing posts with label chevron. Show all posts

Friday, June 26, 2015

Summer w/ Ange Weisbeck

 Hey! Ange here today with a fun layout using lots of tape!


I had so much fun creating this layout and substituting tapes where ever I could.


My favorite way to use Chevron tapes! I used the Lime chevrons here, the color works perfectly with my papers.


For my bold colors I layered the Red, Yellow, Green tape with every other layered going the opposite direction and then just lined them up to make a wave look. I also layered a couple rows of Skull tape to put part of my title on.


To help my title really pop I used this fun bold orange cube tape and then made pleats with it. You just fold it back on itself and you go across the page.

You can see all of these tapes and so many more wonderful tapes in the store.
Thanks for stopping by!
:)Ange

Monday, June 15, 2015

Celebrate card w/ Ange Weisbeck

Hi! 
Ange here today with a super fun almost ALL Love My Tapes card!

I started with a white cardstock base, then added the awesome Happy Birthday tape. After that I layered the rest of the card with this cool Black Diamond tape. The design didn't quite match up if I layered one above the other so I just overlapped them a bit to make it flow.

Then I added a few strips of the Chalkboard Numbers, but cut out the blank black space between number sets. Next I added my sentiment and decided it needed a little help popping, so I used the Red Chevron tape to get the job done.

It's fun to punch through cards so you can see a bit of the inside from the front and with this bold color scheme I thought a bit of orange showing through would look good.

You can get these cool tapes in the store!
Thanks for stopping by,

Monday, April 13, 2015

All About that Sass! w/ Ange

Hey, Ange here today with this super fun layout All About that Sass!
My younger daughter is not really all that sassing but she really can turn it on for a dance competition.


I picked some fun black and red tapes to go with her outfit and then added stars because I think she's a star.


I layered the tapes onto my layout alternating colors and patterns. It make a great base for my title using Moxxie's white alpha.


Then I added some pattern papers and used the star tape for a photo mat and added some of the black chevron for embellishment.


Last I added tapes at the top along with some pattern paper banners and fun embellies.
Super simple and fun!
Thanks for stopping by
:)Ange

Love My Tapes used:

Monday, March 16, 2015

Got Mud? layout

Hi, Ange here today!
I am super excited to be sharing my first layout using Love My Tapes with you.


Got Mud?
We live in Idaho, so the closest thing we have to a beach is a little less sandy and a bit more muddy, but it's still a great place to take the kids in the summer.
I started with a plain white background, added some misting and my mud paper from Moxxie, then got busy with my brand NEW tapes!!
I started with a mat for my photo. I used Black Roses to make a frame under the photo.


I knew I had this fun yellow stripes tape so I planned to add a sun with rays in the upper corner. I just tore off a piece of tape, then cut it lengthwise and randomly added the pieces over the yellow misted area. Some were a little longer than I wanted so I just tore a bit off. Then I added my sun with foam adhesive to pop it off.


For my clouds I actually pulled out a chipboard cloud I've had hanging around for way too long. One side was colorfully decorated and the other was a plain blue. I took the strips of Clouds with Love tape and layered them onto the blue side of the cloud. Then I just trimmed the edges with my scissors. After deciding I needed more clouds, I layered the tape onto some scrap paper and then did my best to cut out clouds that "matched".


Last I cut individual cameras from the Camera tape and then pieces of the Colorful Chevron tape to use on my layout for direction. This is my favorite way to use chevron designs!
I used the double sided adhesive tape on my entire layout and I really love how it rolls on, it holds really well too.

Here's a quick photo of all the fun tapes I got.
I can't wait to create more with them!!


Thanks for stopping by today!
:)Ange

Saturday, June 14, 2014

Can you spot the washi tape?

Happy weekend, Love My Tapes friends!  It's Jaclyn here today with a bit of a little scavenger hunt for you.  Check out the page I put together below and see if you can spot all of the places I used washi tape....


You're probably thinking - pretty simple, huh?!  You've spied the bit of aqua chevron off to the left side of the patterned paper block. 


Quickly located the pretty gold, star tape peeking out above my vertical photo.


And maybe you even spotted the border of pink confetti-dotted tape that runs vertically along the white cardstock block. 


If you stopped there, however, you still haven't identified the large surface area on the page that is covered in washi!  Any more guesses?! Take a closer look at the large block of pink patterned paper.  Rather than using that particular patterned paper, as is (it was originally a pink background with large, scattered white dots), I covered the whole surface of the paper in the pink confetti-dotted tape from LMT. 


Since this particular tape is translucent, it allows for the underlying pattern on the paper to still be seen, but adds an additional pattern and gives the paper an all new look.

I hope this page reminds you to step out of your box and get creative with your tapes. If you typically reach for your washi to create a quick border, adhere a photo or add a pop of color to your project - challenge yourself to layer your tape in a way that alters your page elements for a brand new look.

Thanks for stopping by the blog today!

Friday, May 23, 2014

Washi Tape Art Journal Page


Hi everyone, Katie here! I creating pages in my art journal. Sometimes I journal, sometimes it's just art. Today I'm sharing this page I made using washi tape, stickers and a currently card.

I received some lovely red washi tapes in my design team package. I used those, as well as a muslin/canvas fabric tape and a script washi tape on my page. They went really well with these Dream stickers I had that I've been wanting to use.

As you can see below, I started the page by making a grid with the stickers and tape.
After that, I gave it a wash of white paint, stenciled on a few feathers and attached a card with some journaling by using the black chevron tape. Overall, it was a pretty simple page, but looks really great with all of the patterns from the tape!


Another recent projects I want to share is this simple card. I love how bold the black tape is. It makes a great focal point.

Have a great day! -Katie

Wednesday, May 21, 2014

Washi Action

Happy Wednesday!  Rebecca here. I'm so happy to share my first project with you all.  Tapes are so versatile, and it's easy to create your own patterns and embellishments.  Let's start with these circles.


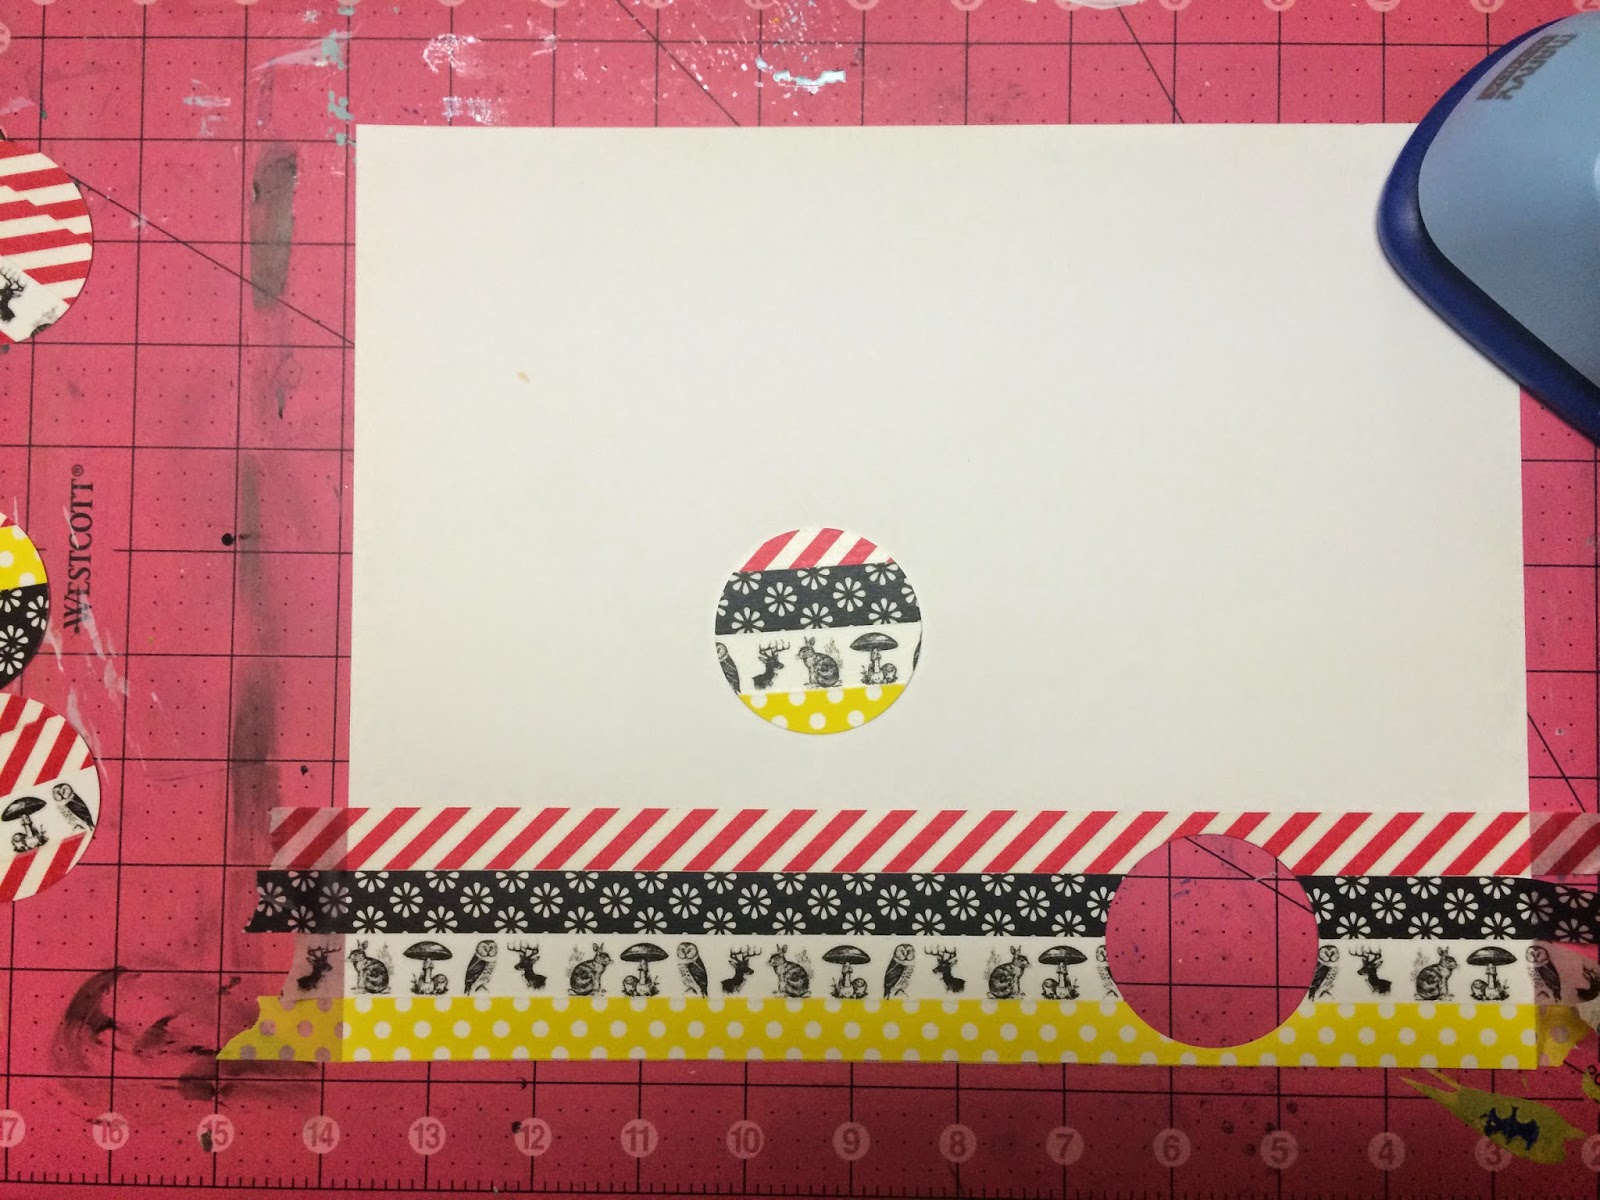
To create these circles, start with cardstock.  Lay several strips of washi tape down with no gap.


Then use a punch or electronic cutting machine to cut circles (or triangles or squares or any other imagineable shape).


Once you have a a good collection, start creating your layout!


I loved layering these circles under a piece of printed transparency.  And while these are brighter colors than I am typically drawn to - I felt like they were completely appropriate for an action movie layout - since an awful lot of super heroes wear black, red and yellow!

Have fun creating your next washi adventure!

Wednesday, November 21, 2012

Digging on Diagonal!

Have you noticed that Diagonal lines have become really popular lately.  The "visual triangle" used to be the "in thing" on layouts, but watch out for the Diagonal design, because it's setting up it's own territory!!  And Love My Tapes is definitely on board with the Diagonal trend, with the awesome Teal Diagonal tape...it is one of my favorites!!!  I think it might just be showing up on about 99.9% of my layouts recently...and today is no exception.  I used it at the bottom of my page to create a doubled up Diagonal.  


I drew a line across the page using a pencil and ruler and then added my first piece of tape on a Diagonal line, to match up with the pencil mark.  I continued added the other pieces and just eye-balled the space in between each piece of tape.  It helped having the lines on the tape, because I was able to keep them lined up, to help with the look of the pattern.  I also used another of my favorite tapes on this one.  The With Love tape made a great border at the top of my page and I love that it comes in Gray, which is also a really popular color right now.

Make sure you give this a try on your next layout or project and it will work with any of your Love My Tape pattern designs!!