Pages

Showing posts with label Christmas. Show all posts

Tuesday, December 23, 2014

Christmas Cards- Lace Tape Style!

Hey everyone, Katie here! Can you believe Christmas is in only 2 days? While it is too late to mail out Christmas cards now, I still wanted to show you these that I made to send to friends. Maybe they'll inspire you to use some of the lovely lace tapes on gift tags!


I love the soft touch the lace tape gives to the cards, don't you?

Merry Christmas!

Wednesday, December 3, 2014

Lace Tape + Glitter Paper Christmas Cards

Hey everyone, Katie here! It's December, can you believe it? Christmas is only a couple of weeks away so it's definitely time to start sending off Christmas cards.
I made these 2 Christmas cards using fabric tapes, silver glitter paper and gold washi.


I started by coloring the lace tapes green with gelatos. I just scribbled the color on them and then sprayed them with water to blend the colors.


I stuck the tapes down onto the front of my card, in a general tree shape..


Then I cut a Christmas tree out of the silver glitter paper and adhered the negative part of the diecut to the front of my card, so that the lace shows through. I love that the glitter paper has an adhesive back!

I created a second card with the glittery Christmas tree diecut that I didn't use on the first card.


Thanks for stopping by today!

Tuesday, November 25, 2014

Christmas Ornaments with Glitter Adhesive Cardstock

Hello Love My Tapes friends! Marcia here today with another idea for how to use those glitter sheets. These glitter sheets are so beautiful and with Christmas coming, I could not help myself from creating a few ornaments.


It's looks like it is just floating inside the ornament. Here is how I did it. My ornaments are the flat round glass ornaments and I found mine at Micheals. You will also need a sheet of transparency from an office supply store. I found an ornament shape in the Silhouette store, sized it slightly smaller than my actual ornament, and cut it out from my transparency sheet. My ornament measured 3" in diameter, so I cut the transparency at 2.9". Then I looked for what shapes I wanted to put inside the ornament and also sized these to 2.9". After cutting with my Silhouette, I peeled of the paper backing and stuck it to my transparency.


Now roll it up and slip it inside the ornament,


Add a little artificial snow if you like. Attach a ribbon to hang it on a tree, or you could even attach to a gift bag.


Aren't they beautiful!
~Marcia

Tuesday, November 18, 2014

Jingle All The Way - Glitter Adhesive Cardstock

Hello Love My Tapes friends! Marcia here today with a home decor project you can make for gifting... or keep for yourself  (because it is so gorgeous!)  It would look perfect on a mantel.


I saw a lot of these on Pinterest last Christmas, but mostly with black vinyl lettering and a splash of red. I thought the kids would love a blue Frozen version with the help of a few Doodlebug stickers and paper.


The Love My Tapes glitter adhesive cardstock cute beautifully with my Silhouette.


so.... Now I need to decide whether to gift this beauty.... or keep it for myself.


Thanks for stopping by.
~Marcia

Monday, September 22, 2014

Box Card with Printed Washi Tape

Hello Love My Tapes friends. Marcia here today. I have been experimenting with printing on washi tape using my computer. Think about all the free fonts available. Not just fonts, what about dingbats? No, I am not talking about a stupid person, but a type of font. 

"A dingbat is an ornament, character or spacer used in typesetting, sometimes more formally known as a printer's ornament orprinter's character. The term continues to be used in the computer industry to describe fonts that have symbols and shapes in the positions designated for alphabetical or numeric characters."

Free fonts and dingbats can be found all over the internet. You could personalize your washi tape with endless possibilities. Want to see what I discovered....

I created this word doc on my computer that combined some of my favorite fonts with some fun dingbats I found....


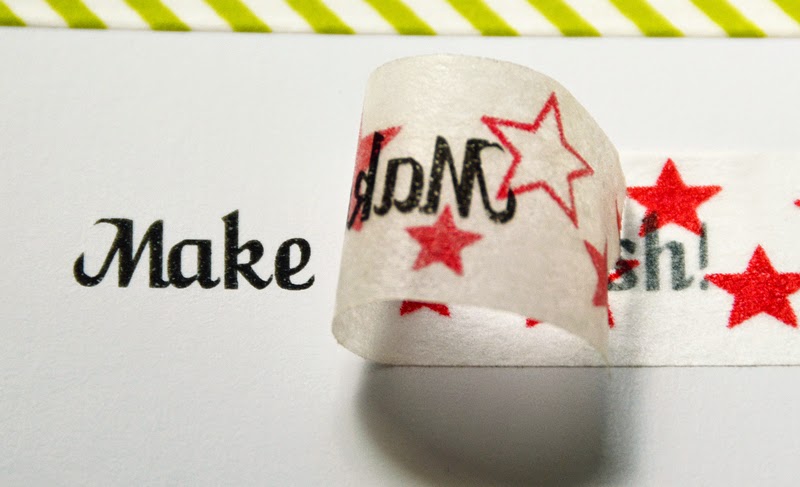
Print it onto glossy photo paper. (Very important so the washi tape will peel off easily.)

Layer a strip of washi tape over the top of the printed words or images. Choose washi tape with muted colors and patterns that won't be distracting.


See how some tapes were better options. The yellow easter eggs turned out best I think. The Robots with the blue stars ended up being too distracting. When you are ready to use the washi, gently peel away from the paper.


I have an inkjet printer. This technique will only work with inkjet printers. If you have a laser printer, check out this link for info How to print on washi tape at Ashbee Design. I did try printing directly onto the washi tape but the inkjet inks won't dry and will eventually smear. 

Here is what I created with my dingbat Santas (which by the way were a dead ringer for the Fancy Pants Merry Little Christmas collection!)


Don't worry, these cards fold flat for mailing. I even created a coordinating envelope.


I hope you give this technique a try.  If you like, you can download a PDF of my WashiDingbats file from here.
~Marcia

Thursday, May 15, 2014

She Said Yes

Hello Love My Tapes friends. Marcia here with my first layout for Love My Tapes! I received some fabulous rolls of washi tape, fabric tape, and lace tape to design with, but a couple rolls just jumped out for me. I was ecstatic to find some engagement/wedding washi tape! I had the perfect photo for that washi tape too. I've been wanting to scrap this photo since Christmas when my daughter and her boyfriend announced their engagement. 


I have been having a love affair with vellum and sequins in addition to my washi love affair. I just can't help myself. Check out this gorgeous washi tape! You can see that engagement/wedding washi in the first close-up and again in the lower left corner of my main photo (It says "Will you marry me?"). I also used an intricate black washi that had hearts in the middle. With the red and white, the pop of black really draws your eye right to that photo.


Thanks for stopping by. Don't you just love these washi tapes too :)

Wednesday, December 19, 2012

Xmas Crafts

Hello! Kathy Martin here with you on this Love My Tapes banner day. I was challenged to make a banner and thought putting one on a holiday scrapbook page would be a timely project since we're just a few days away from Christmas.


I created my banner by adhering strips this lovely striped washi to clear vellum and then used a die to make the pennants. If you don't have a pennant die, you could easily fold pieces of washi in half over your twine.

Wishing you all happy holidays and a stocking full of washi tape!


Monday, December 17, 2012

Pinspiration: Off the Page

It's Mary Ann with a project to share today that started with another project I found on the Love My Tapes Off The Page Pinterest Page. In Rita's original post, she used a paper sack as gift wrapping, and added washi tape to dress it up just a bit. I love the kraft color of the paper sacks, so I used them too for a little Christmas surprise I wanted to make.

This idea has been around for awhile and I've seen many versions of the poem, but this one is my favorite!

I started with a sandwich size bag, filled it with uncooked oats, then added in
gold and red colored cake sprinkles.

Next I cut a circle from the front part of a brown paper sack, then added the bag of food. I folded the top of the sack over, and stapled so it would stay together, and hold the bag of reindeer food, then added a strip of washi tape to cover the staples. I typed the cute poem on a tag, added a strip of washi and used a paper punch. To finish it off, I made a small medallion out of the washi tape (I added the washi to a strip of cardstock before folding), a larger medallion out of patterned paper then added the fun reindeer sticker. Of course the reindeer needed a red rhinestone nose! I can't wait until Christmas eve to see this sprinkled all over our yard ;)

Here is the poem in case you want to make your own Reindeer Food!
 
Be sure to take this MAGIC FOOD
and sprinkle on the lawn,
on Christmas, Santa's Reindeer
travel miles before the dawn.
The smell of oats
and glitter path
will guide them on their way
and you'll wake up
to Santa's gifts next morn
on Christmas Day!
 
Thanks for stopping by today!
 

Friday, November 9, 2012

A Washi Christmas

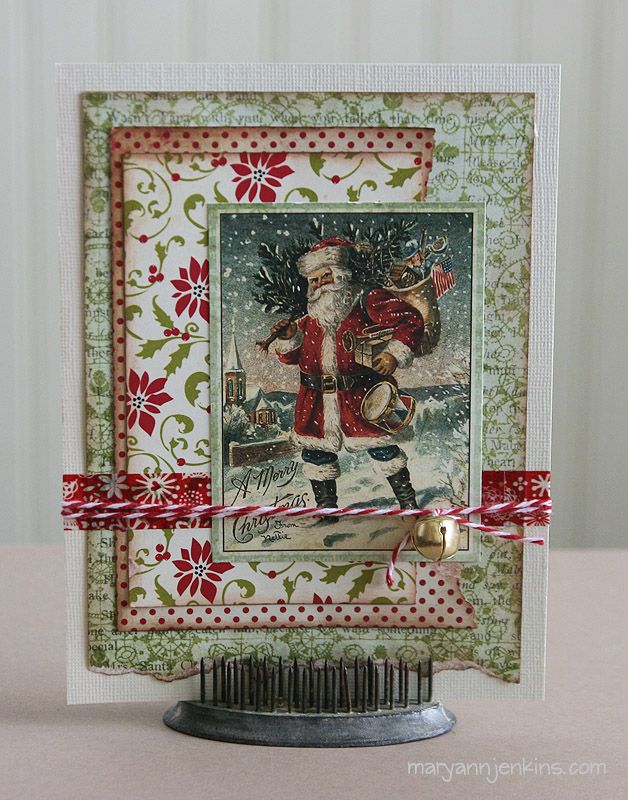
Hi friends! It's Mary Ann here to share a Christmas card, made with papers from my stash (I love when I can do that!) and my favorite red washi tape.
After layering each of the different patterned papers, I added a strip of the washi tape, twine and a cute jingle bell, then glued it to the card base.  I really like how this turned out, and really like how quick and easy it was to make!

Thanks for stopping by today, enjoy your Friday, and have great weekend!