Pages

Showing posts with label Lace Tapes. Show all posts

Saturday, February 21, 2015

A duo of happy and bright cards

Happy Saturday LMT friends!  It's Jaclyn here today hoping to bring you a little bit of sunshine and happy on your Saturday morning.  It's been snowy and COLD where I live in the Midwest, so naturally I've been craving anything and everything to help me stay warm - both physically and even in my crafting!  I've been reaching for bright and tropical colors to cancel out the cold and my two cards I have to share with you today, reflect just that!  Here's a look...

 
I originally started off these cards not intending to use a stitch of washi tape - *GASP*, I know, right?!  I was in the mood to attempt some watercoloring and wasn't even sure the end result would end up on an actual project at all.  After playing with watercolors, stamping, embossed images and even a little stitching here are the pieces I ended up with...


I knew that the rainbow of colors, would find a happy home as the focal point to a couple of cards.  I wanted the watercoloring that I had spent so much time on, to be the focus of the card, so I thought I would simply mount them atop a colorful cardstock base.
 
 
The end result was pretty, yes, but seemed a little too plan and was definitely missing something.  So, what to do?  I reached for my LMT washi stash, of course!
 
For the yellow card, I laid down strips of washi tape to match my rainbow of watercolors, accented with a couple of tone on tone epoxy dots and even added in a bit of messy thread to complete the 'artsy' look.
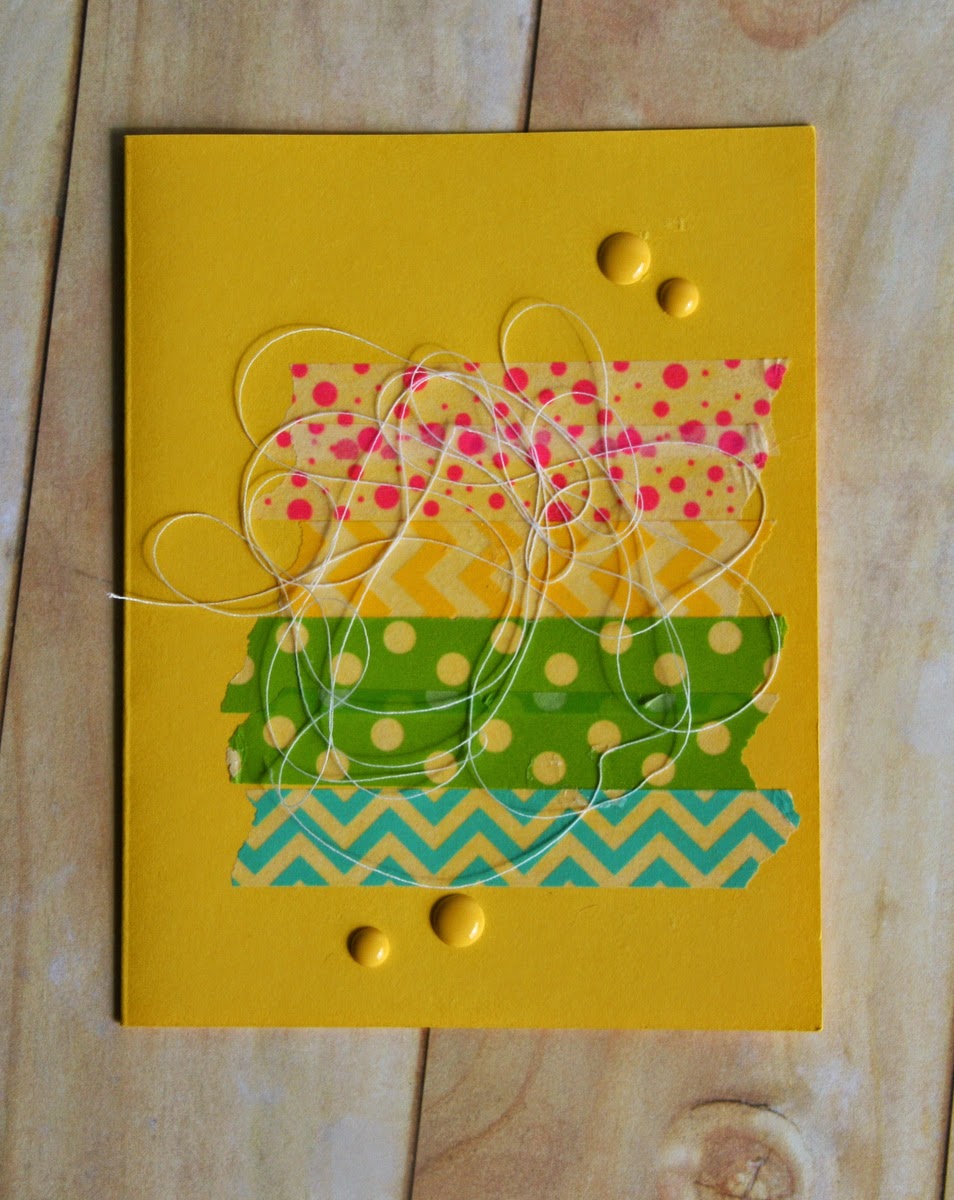


I used a bit of foam adhesive to layer and pop my watercolor piece over the background, and I knew my card was complete!


I was determined that the next watercolored piece (shown above) would look just fine on a solid background.  I had stamped and embossed that image in a bold black and even included a couple additional lines of sentiment.  I knew those two factors would give it more substance to stand alone on a card front.


Again, the results were pretty and the card could have been left alone at this point.  But I had such great success with the washi tape in the last card, I knew this card would benefit from some washi magic, as well!
 
This time, I decided to add some texture with a dry embossed background and a hint of lace tape.
 
 
This was definitely a more subtle transformation than the last card, but worked well since the watercolored piece took up a more substantial area of the card front.  I love the bit of texture the lace tape adds, as well as the focus it draws to the sentiment toward the bottom of the card.
 
 
I hope these cards have brought a little happy to your weekend! Come back and visit us soon, as the new DT girls will be filling up the blog in the coming weeks with all kinds of inspiring projects!

Tuesday, February 3, 2015

Etsy shop! Fabric Tape & Easter?

I am so glad Love My Tapes has an Etsy shop.  I was able to add a few more tapes to my collection that will be perfect for the upcoming holidays. This set of 3 Fabric Tapes is the Haze collection.  I love the look and feel of fabric tapes.  This set is perfect for the Easter or Spring projects.

mynewfab
These 3 fabric tapes are the Haze Collection. 


Here is a look at my new Washi Tape.  I love anything with numbers on it!  The thin black numbered washi tape will be perfect for a project I am doing for school, but it will also work in my journals.   Of course stars are great year round but I plan to use this for my 4th of July Rosette banner.  The gold is fabulous for anything and everything.  Hearts are for some Valentine cards and treat bags.  The banner's were too cute to pass up and the bunnies are on everything that I made this week!

newtapes
mybanner

I covered 2 paper mache eggs with fabric tape, and added a strip of it to my book page egg. The banners were topped off with some of the lace tape and bunny themed washi tape.eggsbook

I covered these paper mache eggs with Love My Tapes bunny washi tape and fabric tapes. Some of the eggs are old text books with only one strip of washi tape and then I added a button.

                                                             
These paper mache eggs were so easy to decorate with tape.. you can either just peel and stick or you can add some glue over and under the tape.  I love quick DIY projects and the kids do to!  I also added a touch of the bunny washi tape to a banner and my Easter book. All of the tapes pictured are from Love My Tapes.

You can purchase them from the new Etsy shop.   If you shop in February use promo code: 2015LOVE and get 15% off a $25 order.. this code ends 2/20/2015

 Please visit the Love My Tapes facebook page or scroll back through our blog posts.  Our designers are amazing and have tons of great washi tape ideas.

dtmember

Kimberly Congdon

Saturday, December 27, 2014

Lace flowers card

Hello Love My Tapes fans! This is Maya and today I am sharing a card made with beautiful lace tape from Love My Tapes.

I made a monochromatic card in shades of white, linen and cream with lace flowers. 


Here is a quick tutorial for making the lace flowers. It is really simple and the adhesive on the back of the lace helps holding everything together.


Vintage buttons look great with this elegant lace. I used another piece of slightly wider lace under the sentiment.


Thank you for stopping by today! I wish you happy and creative 2015!

Tuesday, December 23, 2014

Christmas Cards- Lace Tape Style!

Hey everyone, Katie here! Can you believe Christmas is in only 2 days? While it is too late to mail out Christmas cards now, I still wanted to show you these that I made to send to friends. Maybe they'll inspire you to use some of the lovely lace tapes on gift tags!


I love the soft touch the lace tape gives to the cards, don't you?

Merry Christmas!

Wednesday, November 26, 2014

Lace Tape card backdrop

Hi Love My Tape friends, it's Jaclyn here today.  Do you need to whip up a quick card for the host/hostess of your Thanksgiving celebration?  If so, you're in luck!  I've got a quick and easy solution for you that's high on style and texture.  The secret ingredient to making this card both beautiful and simple is the lace tape backdrop.


To create said backdrop, all you need to do is trim a piece of cardstock down to fit your card front.  Since I created a standard 4.25 x 5.5" card, I trimmed my cardstock panel to 3.5 x 4.75".  Then, simply lay a series of horizontal lace tape strips across the cardstock piece, covering it in it's entirety.  The excess tape on the left and right edges can be trimmed to the same size of the cardstock width or wrapped around and adhered to the backside, as I've done here.


The lace tape backdrop adds some much texture, dimension and interest to the card.  It does a beautiful job of highlighting the simple, stamped tag and sentiment that are the focal point of the greeting.


So, if you're short on time but need a beautiful token of your appreciation this Thanksgiving season (or anytime, really!) - reach for your lace tapes to create a stunning and sophisticated starting point!


Wednesday, November 5, 2014

Glitter and Lace Autumn Cards

Hey everyone, Katie here! Today I'm sharing these 2 cards I created using some lace tape and the new adhesive backed glitter paper that Love my Tapes offers!

The new glitter paper comes in more than 30 colors, but I went for gold for a stunning look on these Autumn cards.


I cut the leafs out on my Brother Scan N Cut, and in case you're wondering- the glitter paper worked just fine and dandy in my diecut machine! :)

To make the bow, I used some thin lace tape and just made it like you would a paper bow. I love the soft touch and extra texture it adds. Lots of texture here between the lace and the glitter- perfect for Autumn!


What color glitter paper would be your favorite?

Monday, October 6, 2014

Halloween Mini Banner

Hey everyone, Katie here! Today I wanted to share with you guys the mini banner I created for Halloween using some of my tapes!


I made the circles by just layering black and white washi tapes on to paper and then die cutting the circles in my Brother ScanNCut machine, pretty simple.

For the candy corn, I didn't have any orange tapes! Oh no! So, I grabbed some of my white lace tapes and some orange gelatos. I rubbed the gelatos around on the tape and then misted them with water to "dye" the white lace tape.
I saw Tessa (fellow LMT designer!) do this technique and have loved it ever since!


To make the candy corn, I layered the tapes on a piece of paper, then drew rounded triangles onto the back of the paper with a pencil and cut them out.


To put my banner together, I just ran my circles and candy corn through the sewing machine, spacing them evenly.


This is such an easy way to make some decor for your home, just in time for Autumn! :)

Friday, September 12, 2014

Lace tape borders

Happy Friday!  It's Jaclyn back again today, to share with you a recent scrapbook page I created. 


The pictures I had to document this memory were plenty - therefore taking up a majority of the 12x12 page.  However, I wanted to be sure to add lots of texture and pattern to the page as well.  Because, well, half the fun of scrapbooking is adding in all the pretty products.  Am I right?! ;) Since I was limited on space, I used a variety of strips of patterned paper to create interest around and frame my block of photos.  To add in some additional texture and interest, I layered in a couple of lengths of lace tape.  The LMT tape proved to be the perfect compliment to my paper choices and I love the extra dimension it adds.


I can't end this post without noting that the cupcakes in these pictures were the BEST I've ever had!  So here's my PSA for today - if you're ever in Chicago or New York make it a priority to stop and stuff your face at Molly's Cupcakes!  And when you do, you can scrapbook the memory and reach for your stash of pretty tapes!

Friday, August 8, 2014

Washi Tape Covered Pencils


Hi Love My Tapes fans! Dana here sharing some washi tape covered pencils that are sure to go straight to the head of the class. My daughters are headed back to school in a couple of weeks and we thought it would be fun to dress up some pencils for the upcoming school year.

I chose colorful patterned pencils to cover with tape. Several of the Love My Tapes washi tapes with white in the design are semi-translucent, so the color shows through the tape for a cool effect. I used two different patterns of tape for each pencil and then covered the seam with lace tape. This project was quick and fun and I didn't need any additional adhesive! Also, the washi tape is thin enough to not effect sharpening in any way.


I have a feeling I'll be dressing up more pencils for their friends! Thanks for stopping by today!

~Dana

Thursday, August 7, 2014

National Peach Month PL Cards

Hi everyone, Katie here today! Did you know it is national peach month? I love anything peach flavored!

I wanted to document my love of peaches, so I used a photo I posted on instagram of a peach milkshake and created these cards for Project Life.


I loved the technique Tessa used for coloring the lace tapes with gelatos, so I used some orangey and melon colored gelatos to tint my lace tapes to better match my cards.

I also used both a yellow and green fabric tape. I layered the yellow fabric tape with the lace tapes, but for the green fabric tape, I lined them up on paper and cut peach leaves out of it.


The tapes I used are pictured below-


Do you love peach flavored things too? It's my second favorite flavor- right after pumpkin flavored things!

Thanks for stopping by! -Katie

Sunday, July 6, 2014

Adding texture with tape

Happy Sunday, it's Jaclyn here today!  I hope you are enjoying the last bit of the weekend, and maybe even sneaking in a little crafting before the craziness of Monday rolls around.  I wanted to pop in quickly to share a card I put together, using a few simple supplies alongside some pretty lace tape.

 
At first glance this card is both simple and neutral, but what makes it special is all of the added texture it features.  The beige cardstock background has been embossed with an embossing folder, which adds subtle interest and dimension. 
 
 
But the real star of the show, is the pretty lace tape! As you might note, most of the design of the card is concentrated along the right edge.  The lace tape that peeks out as a border, along the right most edge of the cardstock adds subtle detail and loads of texture.  In addition, it also keeps your eye settled and focused on the small embellishment cluster, that is the highlight of the card.


What I also love about the tape, is that it has a fairly flat profile.  While it adds a great pop to your projects, it doesn't add too much bulk,  making a card like this one simple to slip in a envelop and send through the mail!

Thanks for stopping by!  I hope you'll be back tomorrow to see another fun project the design team has to share with you!

Sunday, June 29, 2014

Niagara Falls and Lace Tape

It's Rebecca today!  I guess Niagara Falls and lace tape don't really have something in common, except they certainly go well together when you combine them in a scrapbooking layout! I've had this idea for a while to use only an embellishment sheet and cardstock to create a layout.  Adding in the lace washi tape really grounded everything.  I like, too, that this layout isn't necessarily "froufy" but the more elaborate tape complements it perfectly!  


I'd love to see how you use lace tape!  I hope you'll link up in the comments!

Thursday, June 26, 2014

Baby Card with Lace Tape

Hello Love My Tapes friends! Marcia here today sharing a baby card I made with adhesive lace tape. When I received this onesie card die cut from Top Dog Dies, the first thing I thought of was adding some ruffled lace to the back side of the onesie. I loved dressing my girls up when they were babies with clothes that had ruffled butts :)  It was easy to do with Love My Tapes adhesive lace. This lace is one of my new favorite things to hoard, lol. The onesie card could be used for a baby shower invite, a baby shower card, a thank you card, or as a baby announcement. Here is the card I made ...


There is a die to cut an insert for inside the card that you can use to add a writing space. I love that Top Dog thought of this, because most pattern papers are double sided.


and my favorite back side view...


Now I said this lace had an adhesive back, so how did I keep it from sticking to everything where the lace is peeking out at the leg openings? I applied some baby powder to the sticky side using my EK Success Powder Tool. Now my card even smells like a baby :)


If you love crafting with lace, you NEED to try lace tape. It's so much easier to use than trying to glue lace down. 

Thanks for stopping by.